**Getting Started**
==========
Introduction
------------
We would like to thank you for purchasing Induscity! We are very pleased that you have chosen Induscity for your website, you will not be disappointed! Before you get started, please be sure to always search our Documentation. We outline all kinds of good information, and provide you with all the details you need to use Induscity.
Install WordPress
-----------------
To install this theme you must have a working version of WordPress already installed. You should ALWAYS be running the latest version of WordPress anyway, because otherwise you put your whole site at risk for potential threats. Never use an outdated version of WordPress.
If you need help installing WordPress, follow the instructions in [WordPress Codex](http://codex.wordpress.org/Installing_WordPress). Below are all the useful links for WordPress information.
- [WordPress Codex](http://codex.wordpress.org/Installing_WordPress) – General info about WordPress and how to install on your server.
- [First Steps With WordPress](http://codex.wordpress.org/First_Steps_With_WordPress) – General info about multiple topics about WordPress.
- [FAQ New To WordPress](http://codex.wordpress.org/FAQ_New_To_WordPress) – The most popular FAQ’s regarding WordPress.
Recommended PHP Configuration Limits
------------------------------------
Many issues that you may run into such as; white screen, demo content fails when importing, empty page content and other similar issues are all related to low PHP configuration limits. The solution is to increase the PHP limits. You can do this on your own, or contact your web host and ask them to increase those limits to a minimum as follows:
- max_execution_time: 180
- memory_limit: 128M
- post_max_size: 32M
- upload_max_filesize: 32M
Licensing Plugins
-----------------
The theme included the licensing plugin: Visual Composer, we purchased it from codecanyone.net and included it for free in the theme package without any issues. However, if you want automatic updates and support from the plugin developer, you need to purchase it separately (this is 100% optional). Because we are not allowed to include the license key for it, so you do NOT have a purchase code for that plugin and you can’t enter anything in this field. If there is any update, we are accountable for updating the theme with the newest version of this plugin.
Files included in the package
-----------------------------
Below is a full list of everything that is included when you download the main files, along with a brief description of each item.
- `induscity.zip`: main theme file that need to be uploaded to host to install Induscity theme.
- `induscity-child.zip`: basic child theme of Induscity theme. It is created for people who want to customize code of the Induscity theme.
- `Demo Data`: this folder contains demo data that exported our demo.
- `widgets.wie`: this file contains all widgets which are exported from our demo.
- `demo-content.xml`: this file contains all sample content which will help you to have a first look of how we use Induscity theme.
- `customizer.dat`: theme option backup file.
- `Documentation`: documentation folder that contains documentation files.
**Installation**
==========
How To Install Your Theme
-------------------------
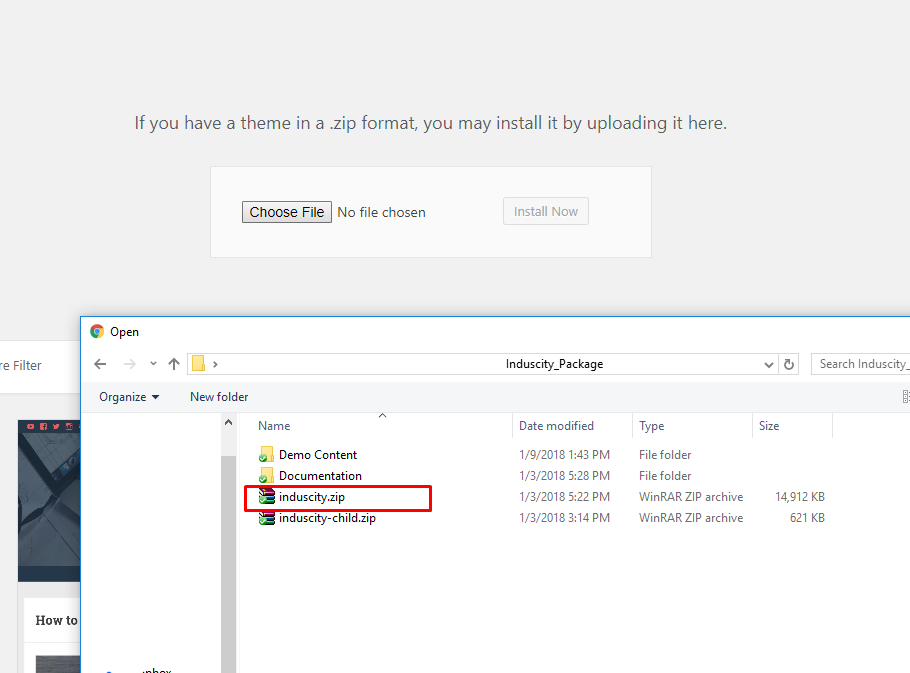
After you download the package from ThemeForest, please unzip it. You'll see a file called `induscity.zip`, which is the main file needed to upload and install.
> Important: One of the most common reasons people have issues is
> because they try uploading the Full zip that includes sample data,
> documentation etc which displays the “The package could not be
> installed. The theme is missing the style.css stylesheet.” error.
> Please make sure you are uploading only the installable theme which is
> called induscity.zip.
You can either choose to upload and installl the theme using **WordPress theme install** or use **FTP** function.
**Install theme using WordPress**
- Log into your WordPress website and go to `Appearance > Themes` and click **Add New**
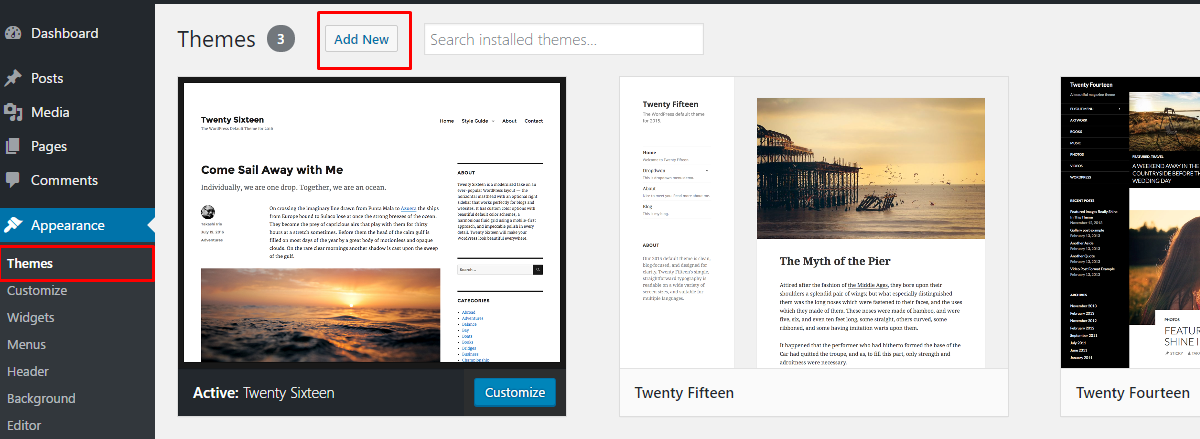
- Click on the option to **Upload Theme**

- Click **Choose File** and select the `induscity.zip` file
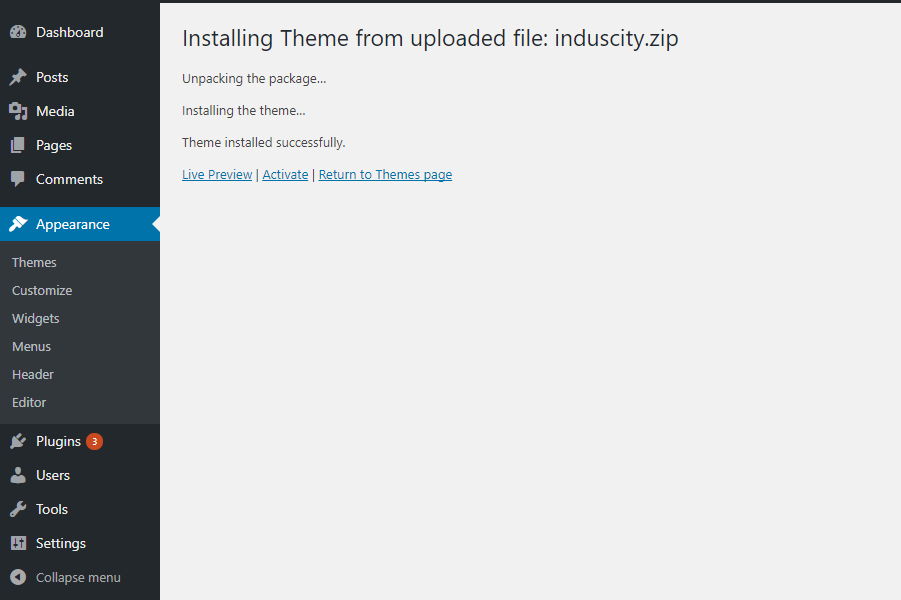
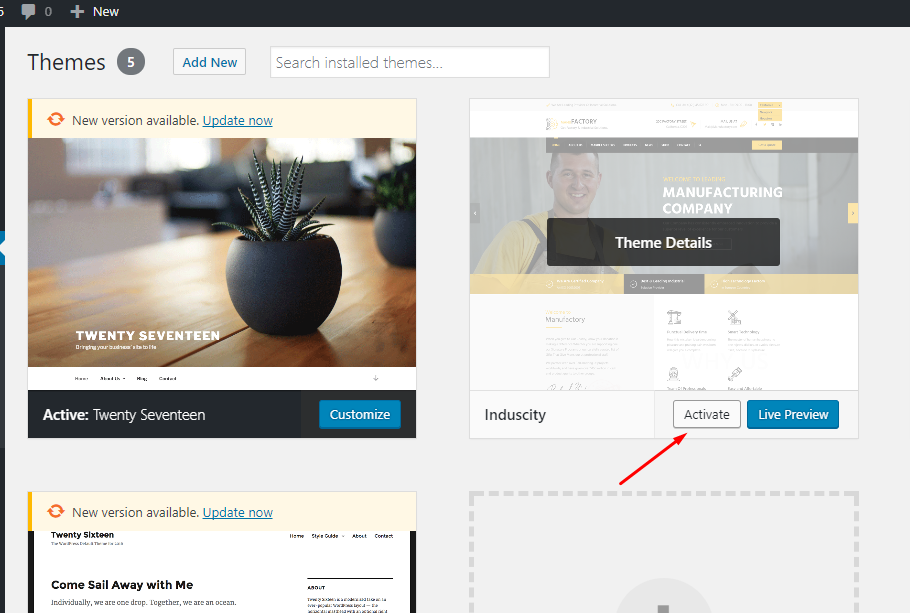
- Click **Install Now**. When upload and installation progresses are completed, click **Activate**, or go to `Appearance > Themes` and activate the **Induscity** theme.
If you get the “Are You Sure You Want To Do This” message when installing induscity.zip file via WordPress, it means you have an upload file size limit. You need to install the theme via FTP, or contact your hosting provider to increase the limit.
----------
**Upload and install using FTP**
- Unzip the `induscity.zip` file, you'll get a folder `induscity`
- Use a FTP client like [FileZilla](http://filezilla-project.org/) and upload that folder to `wp-content/themes` folder on your host
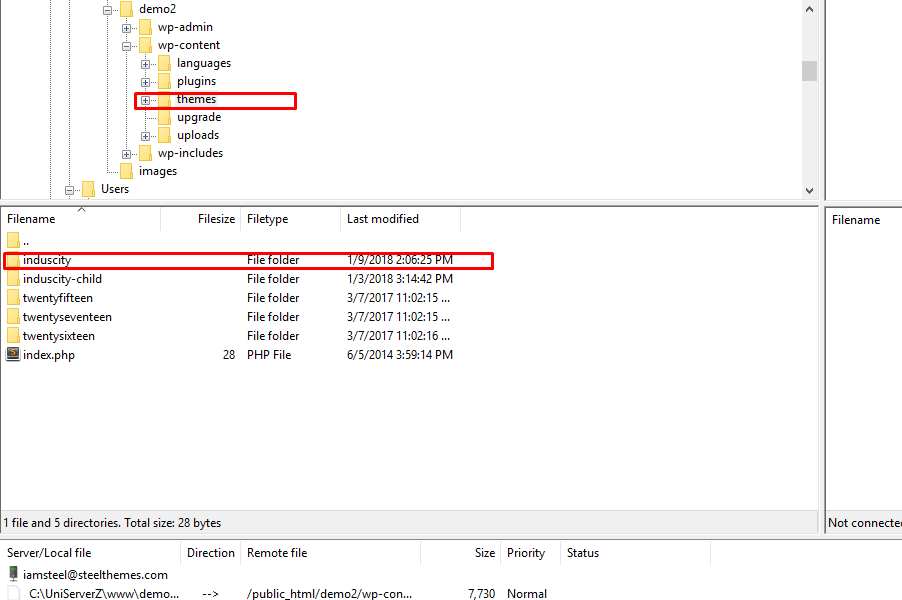
- Go to `Appearance > Themes` and activate the **Induscity** theme.
How To Install Plugins Included
----------------
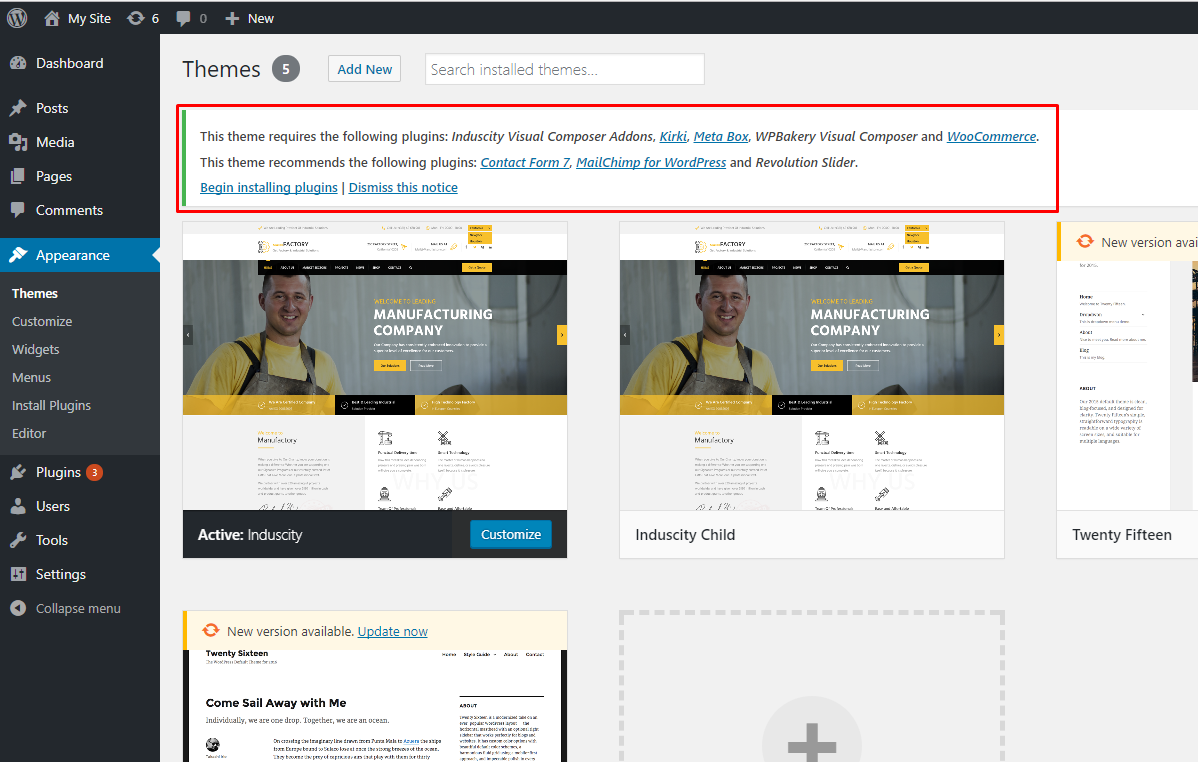
After installing the Induscity theme, you'll see a notification in the top of the page that says the theme needs some plugins to function properly.
The Induscity theme **requires** following plugins:
- Induscity Visual Composer Addons: extra elements for Visual Composer. It was built for Induscity theme.
- [Meta Box](https://wordpress.org/plugins/meta-box/): plugin for creating meta boxes for posts, pages,... It is free and available on WordPress.org
- [Kirki](https://wordpress.org/plugins/kirki/): The ultimate toolkit for theme developers using the WordPress Customizer
- [WPBakery Visual Composer](http://vc.wpbakery.com/): it is Drag and Drop Frontend and Backend Pagebuilder Plugin for Wordpress.
The Induscity theme **recommends** following plugins:
- [Woocommerce](https://wordpress.org/plugins/woocommerce/): it is a powerful, extendable eCommerce plugin that helps you sell anything.
- [Contact Form 7](https://wordpress.org/plugins/contact-form-7/): plugin for creating contact forms. It is free and available on WordPress.org
- [ MailChimp for WordPress](https://wordpress.org/plugins/mailchimp-for-wp/): helps you add more subscribers to your MailChimp lists using various methods.
- [ Revolution Slider](http://revolution.themepunch.com/): is an all-purpose slide displaying solution that allows for showing almost any kind of content with highly customizable, transitions, effects and custom animations. Due to its visual oriented interface and countless options, Slider Revolution is suited for beginners and pro’s alike!
Induscity is working perfectly with these plugins. It automatically adds more styles to them to make the design match the theme.
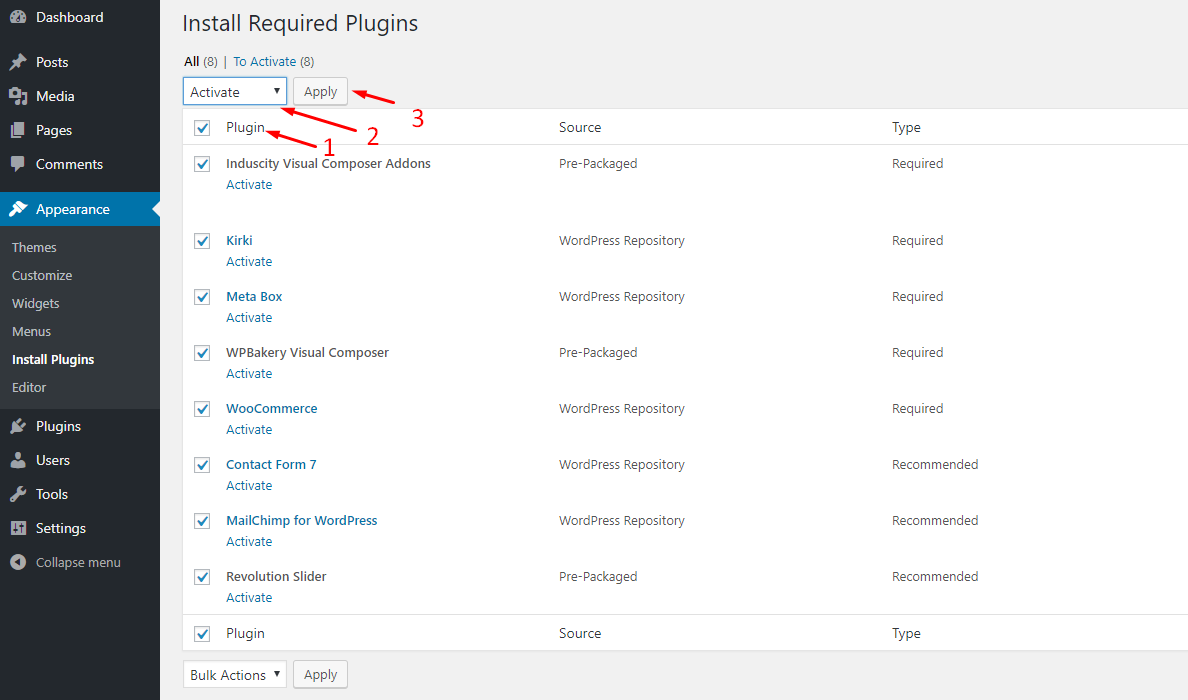
To install these plugins:
- Click **Begin installing plugins** the top of the page
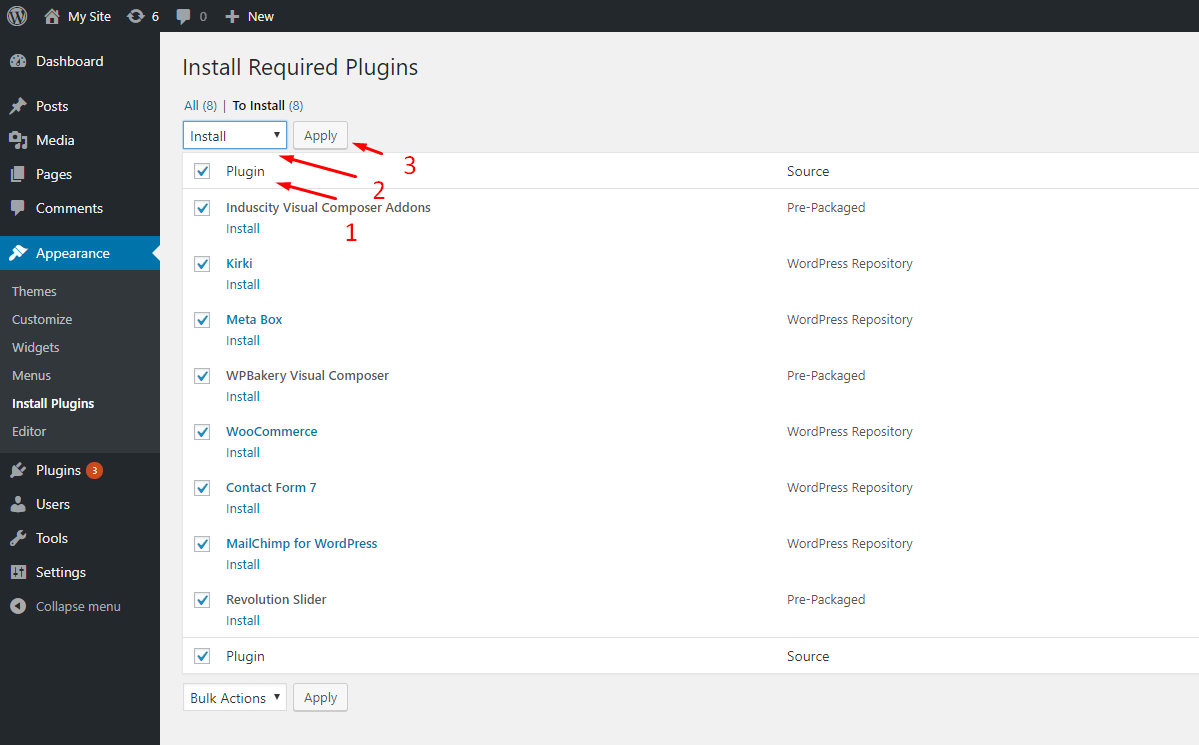
- Check boxes to select all the plugins you want to install and click on **Install** from the dropdown box and then click the button to **Apply**.
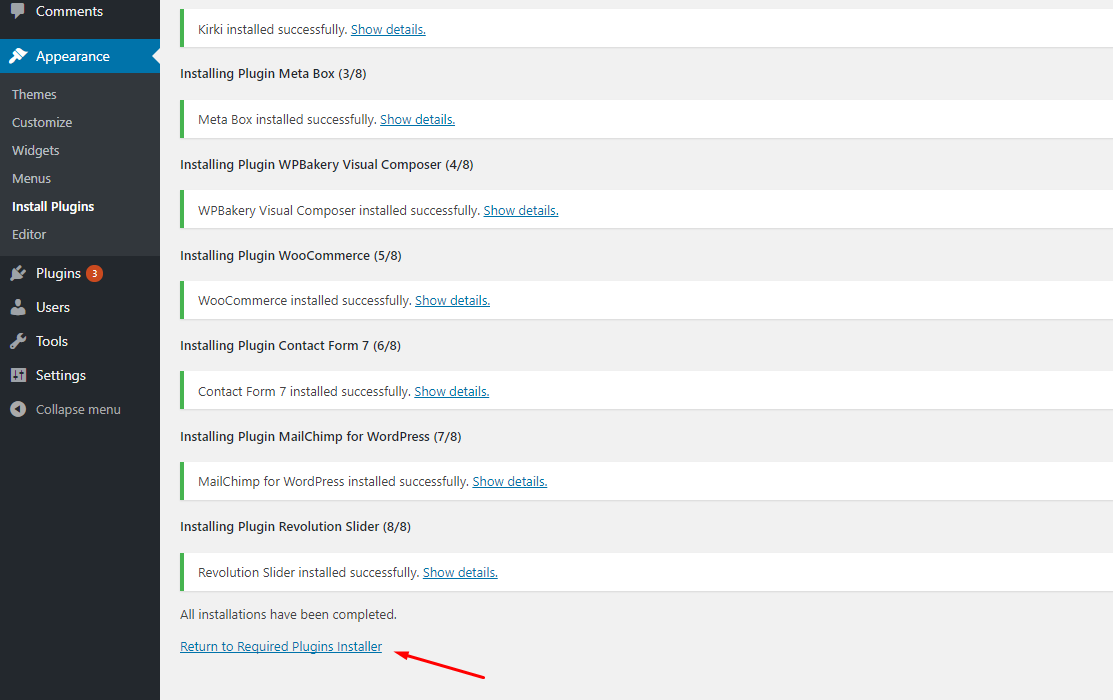
- After you have installed all the plugins, return to the plugin installer.
- Select the plugins you installed, and apply the bulk action to activate.
**Enable Custom Post type**
==========
How To Enable Service and Portfolio.
----------------
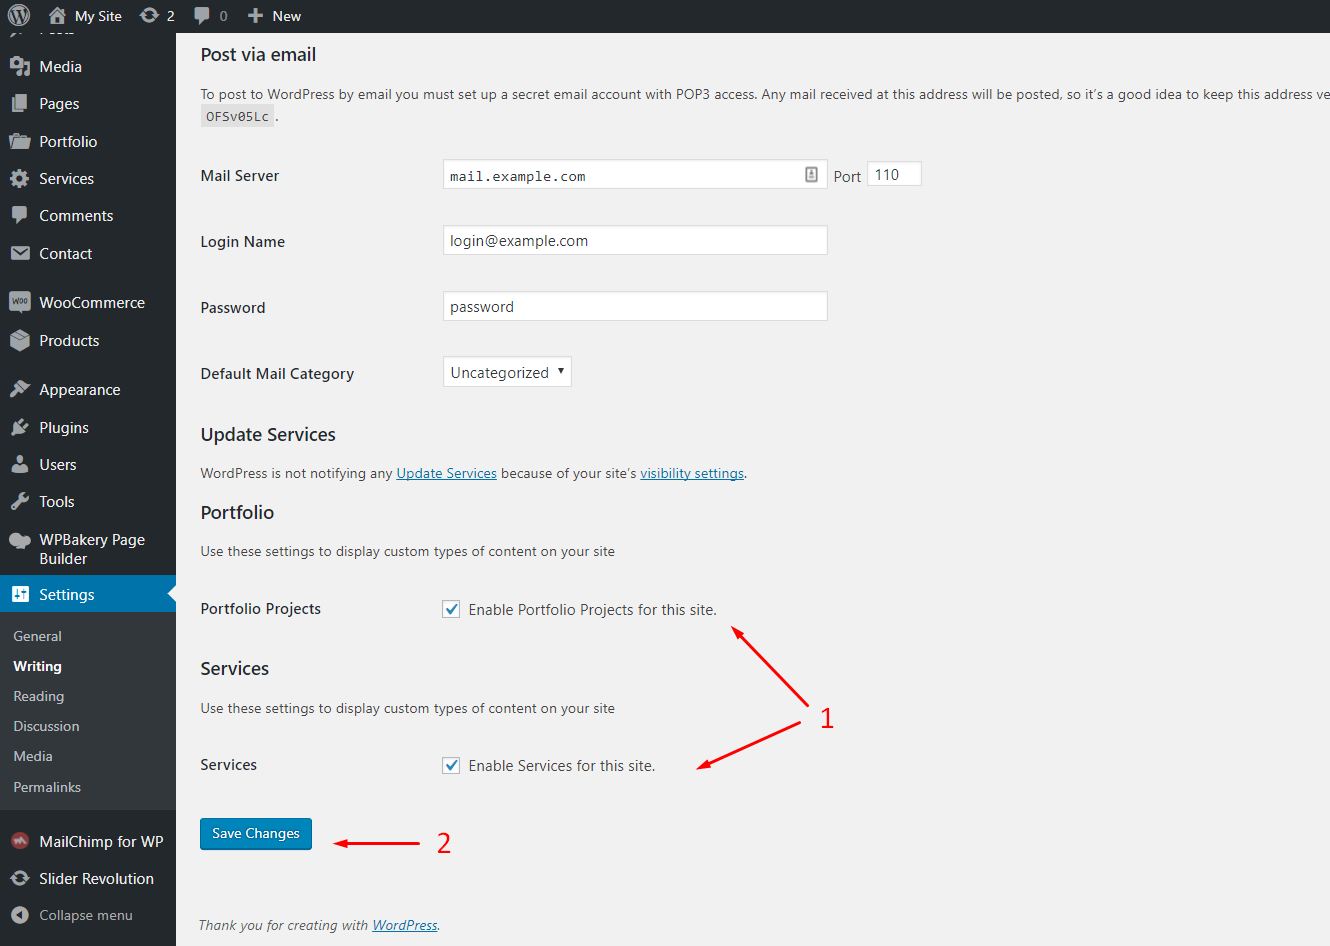
**Remember enable before import demo content.**
- Go to **Settings> Writing** settings
- Select the Post type you would like to use.
- Click the **Save Change** button.
**Updates**
==========
How To Update Your Theme
----------------
There are 2 ways to automatic update your theme: use Envato Market Plugin or the Envato Toolkit plugin for automatic theme updates.
Important: After updating the theme, all your content such as pages, options, images and posts will not be lost or erased by doing this. However, any customizations to the theme’s core files, such as PHP files, language files will be lost. So you need to the child theme to customize the theme and backup the lang file if you translated the theme.
**Method 1**: Automatic Updates via The Envato Market Plugin
The Envato Market plugin can install WordPress themes and plugins purchased from ThemeForest & CodeCanyon by connecting with the Envato Market API using a secure OAuth personal token. Once your themes & plugins are installed WordPress will periodically check for updates, so keeping your items up to date is as simple as a few clicks.
- Step 1 – Download [WP Envato Market](http://envato.github.io/wp-envato-market/) plugin.
- Step 2 – Install and Active the plugin. Read our Install a Plugin using the WordPress Admin Plugin Upload or Manually Install a WordPress Plugin using FTP article to learn how to install and active a plugin.
- Step 3 – If you translated the theme and the language files are in themes/induscity/lang/, you need to upload them to wp-content/languages/themes/. If not, After updating the theme, any customizations to the theme’s core files, such as PHP files, language files will be lost.
- Step 4 – Click the Envato Market‘ menu in WordPress and connect to the API.
- Step 5 – Don’t forget to update the required plugins
**Method 2**: Automatic Updates Via Envato Toolkit
The Envato Toolkit is a great plugin created by Envato so you can update any ThemeForest theme right via your WordPress dashboard.
- Step 1 – Download [Envato WordPress Toolkit](https://github.com/envato/envato-wordpress-toolkit) plugin.
- Step 2 – Install and Active the plugin. Read our Install a Plugin using the WordPress Admin Plugin Upload or Manually Install a WordPress Plugin using FTP article to learn how to install and active a plugin.
- Step 3 – If you translated the theme and the language files are in themes/induscity/lang/, you need to upload them to wp-content/languages/themes/. If not, After updating the theme, any customizations to the theme’s core files, such as PHP files, language files will be lost.
- Step 4 – Click the Envato Market menu in WordPress and connect to the API.
- Step 5 – Don’t forget to update the required plugins
**Demo Content**
==========
One click import demo content
-----------------------------
The easiest way to import our demo content is to use our Demo Content Importer. Our importer will give you all pages and posts, sample sliders, widgets, Theme Options, and more with one click. To import our demo content, please see the steps below.
Step 1 - Install Demo Importer plugin
- Go to [there](http://demo2.steelthemes.com/plugins/soo-demo-importer.zip) to download soo-demo-importer.zip plugin.
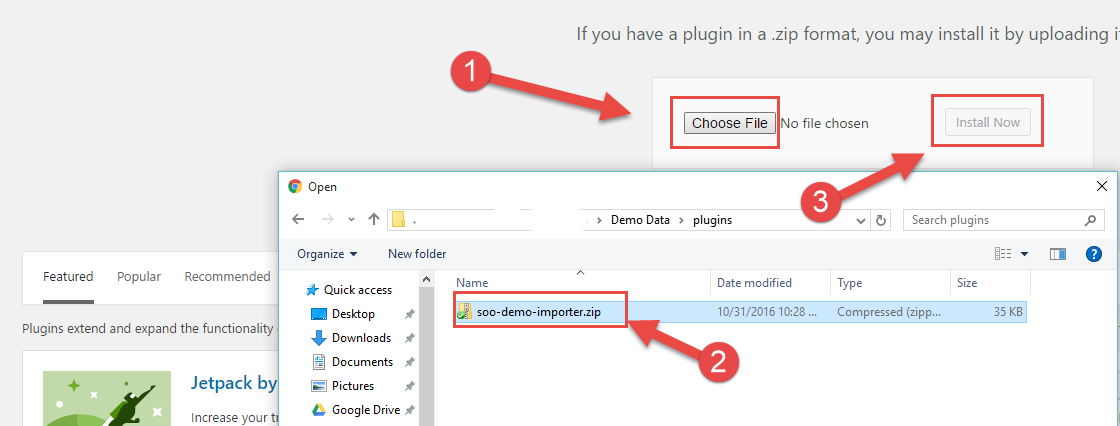
- Install a Plugin using Upload Method
- Go to Plugins > Add New.
- Click to Upload Plugin.
- Click to Choose File, browse soo-demo-importer.zip in plugins folder of package theme and upload it.
- Click to Install Now.
- Click on Activate the plugin.
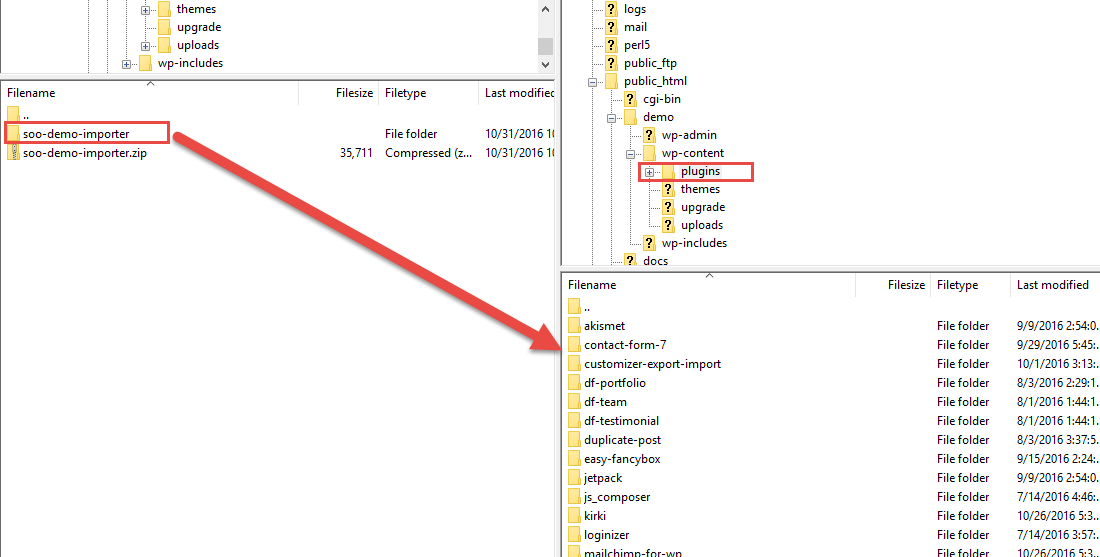
- Install a Plugin using FTP Manager
- You can use a FTP client like FileZilla.
- Unzip the soo-demo-importer.zip file, you'll get a folder soo-demo-importer.
- Upload that folder to wp-content/plugins folder on your host.
- Go to Appearance > Plugins and activate the soo-demo-importer plugin.
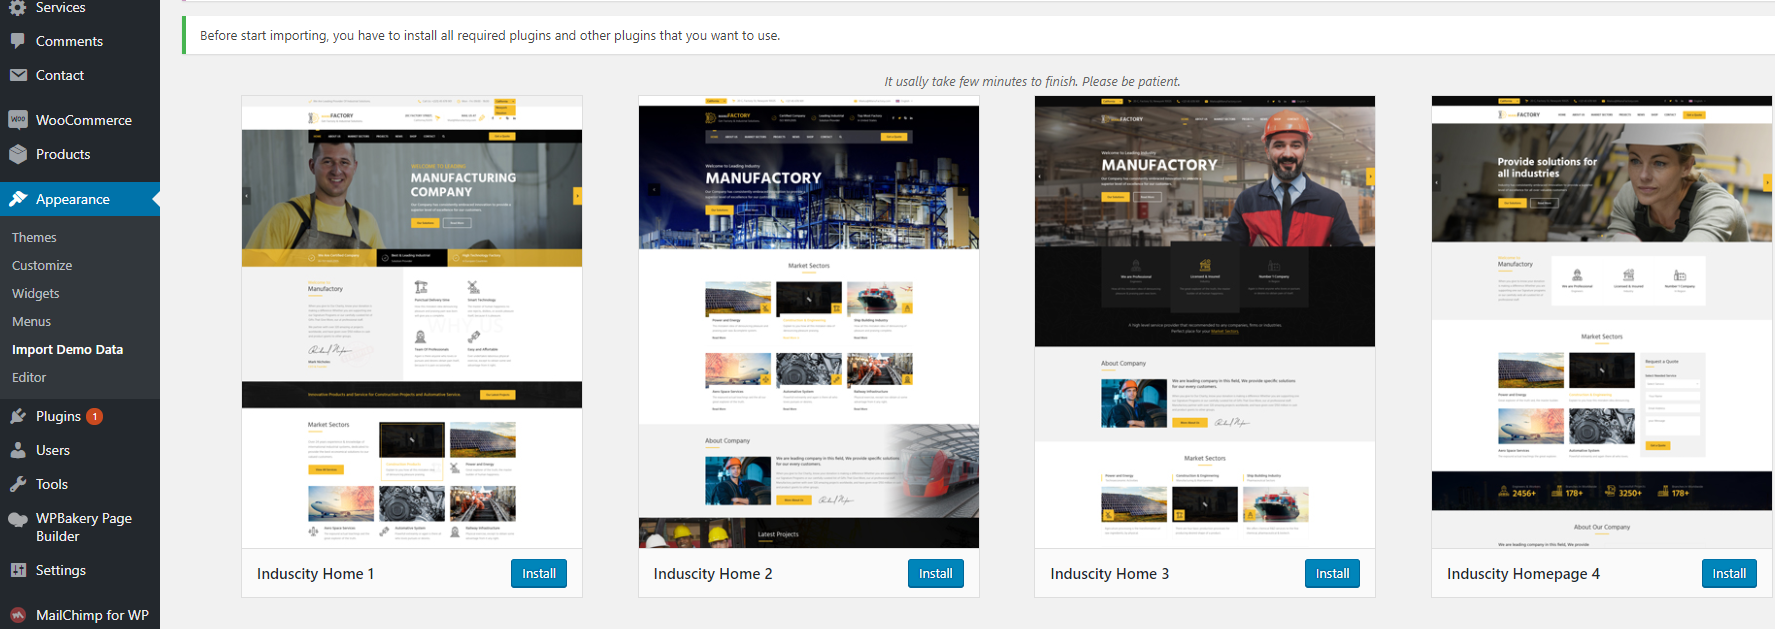
**Step 2 - Import demo content**
- Go to Appearance>Theme option data.
- Choose the demo and data you want to import.
- Click Import.
**Step 3 - The final step**
There are some things you need to change. To do them, please see the steps below.
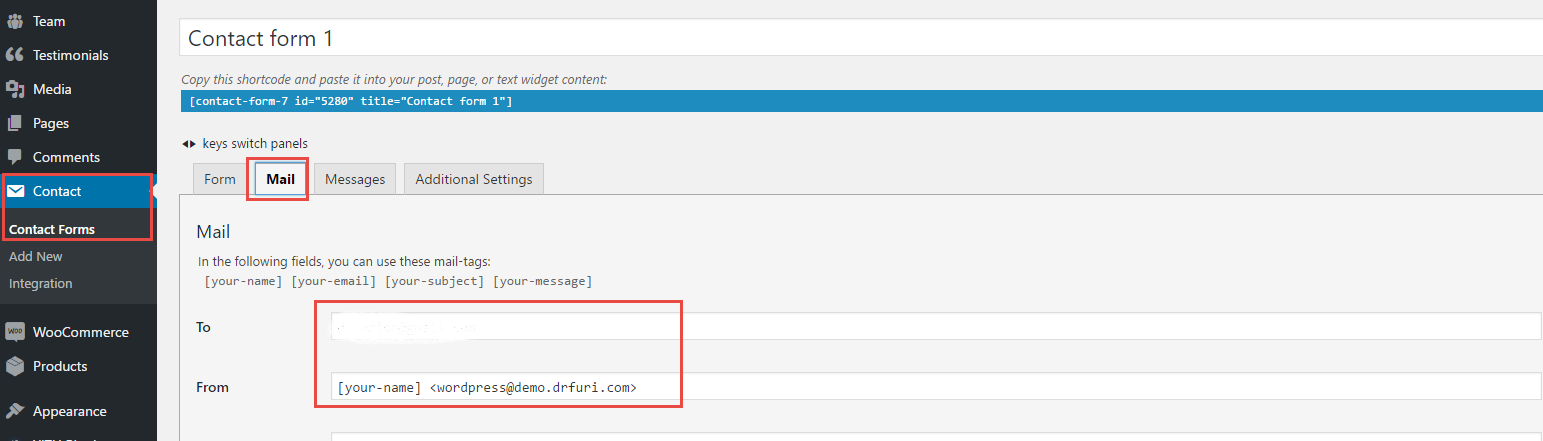
**Contact Form 7:**
- Go to `Contact`>`Contact forms`>`Edit Contact form`>`Mail`:
- Contact Form 7 : There are several things you need to change here such as the email addresses...(as red-made in the screenshot):
**Activate & Save Permalinks**
To prevent any 404 errors on custom post type pages, after installing and activating plugins for this theme, you need to activate & save permalinks.
- Go to **Settings> Permalink** settings
- Select the format you would like to use.
- Click the **save** button.

Manual Import demo content
----------------------------
Step 1 - Where To Find Demo Files
Go to the download package >Demo Data folder you will see XML, widgets.wie file and homepage folders included a customizer.dat file, a widgets.wie file.
Read our Files Included In The Package to know file structure of homepages.
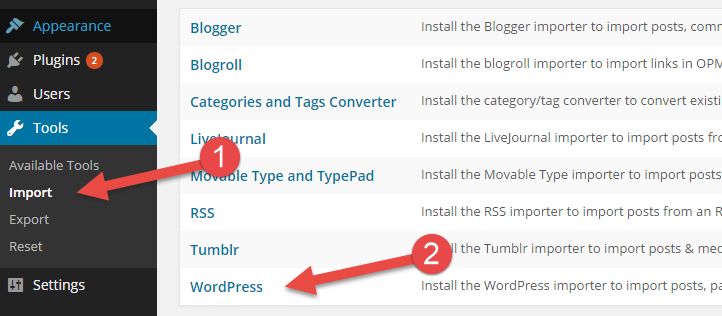
Step 2 - How to Import XML Files
- Go to `Tools > Import`
- Select WordPress from the list and install the WordPress Importer Plugin.
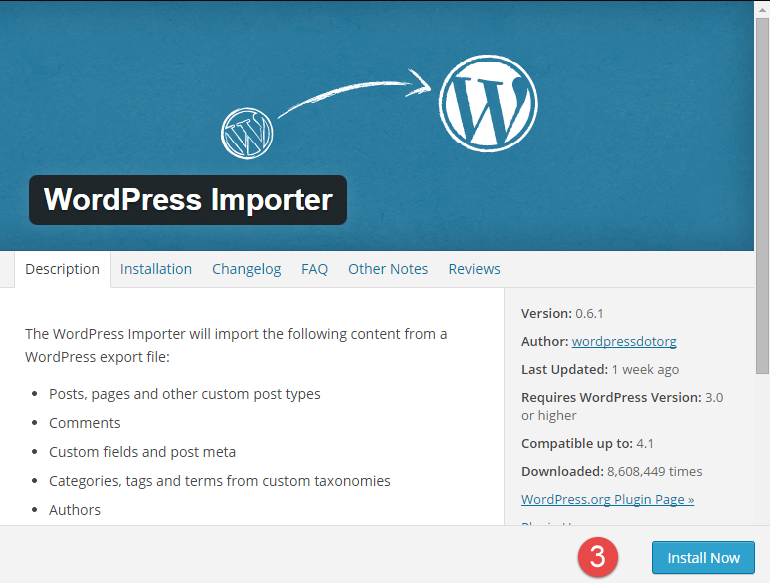
- If you haven't installed the **WordPress import plugin**, a popup window will appears and ask you to install it. Just click **Install Now**. When the installation progress is completed, click **Activate Plugin & Run Importer**. If you have installed this plugin, skip to next step.
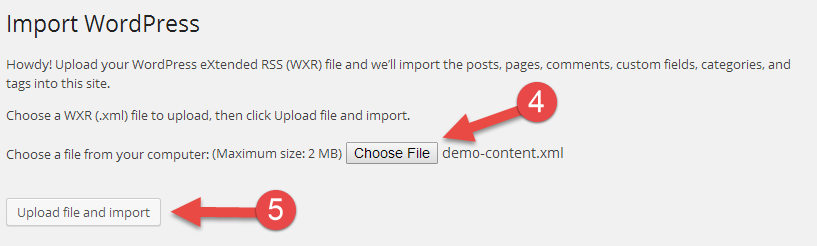
- Click **Browse** and select `demo-content.xml` file from the download package
- Click **Upload file and import**
- When you are asked to import author, you can create new author or import to existing author. You also should check the checkbox **Download and import file attachments**.
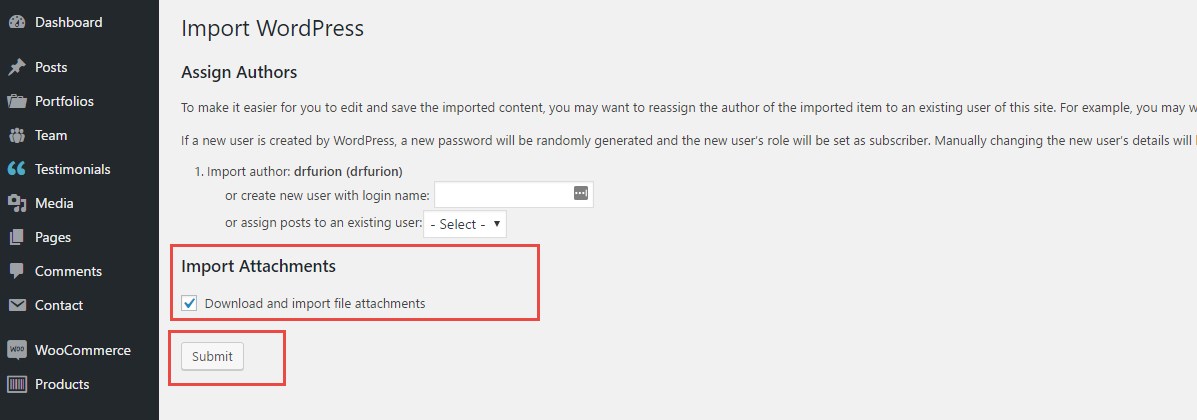
After completing all above steps, go to `Posts`, `Pages`, `Products` to see imported data.
Step 3 - Import Widgets Data
- Install and activate the [Widgets Importer/Exporter](https://wordpress.org/plugins/widget-importer-exporter/) plugin.
- Go to Tools > Widget Importer & Exporter, click Choose file button and select widgets-data.wie file from the download package.
- Click to Import widgets.
Step 4 - How to Import Customize File
- Install and activate the [Customizer Export/Import](https://wordpress.org/plugins/customizer-export-import/) plugin.
- Go to Appearance > Customize > Export/Import.
- Click Choose File and select customizer.dat file from your homepage folder.
- Click the Download and import image files and Import button.
Step 5 - Setup homepage and blog page
After install demo content, you'll see a page `Front Page`. This page will be used as the homepage of the website. To set it as homepage, please go to `Settings \ Reading`, under **Front page displays**, please chose **A static page (select below)** and select **Front Page** for **Front page** and **Blog** page for **Posts page**.

Step 6 - Setup Custom Menu
The import function of WordPress doesn’t support to import setting of widget Custom Menu and there are some things you need to change. To do them, please see the steps below.
You need to do this setup if your demo has Footer Widgets.
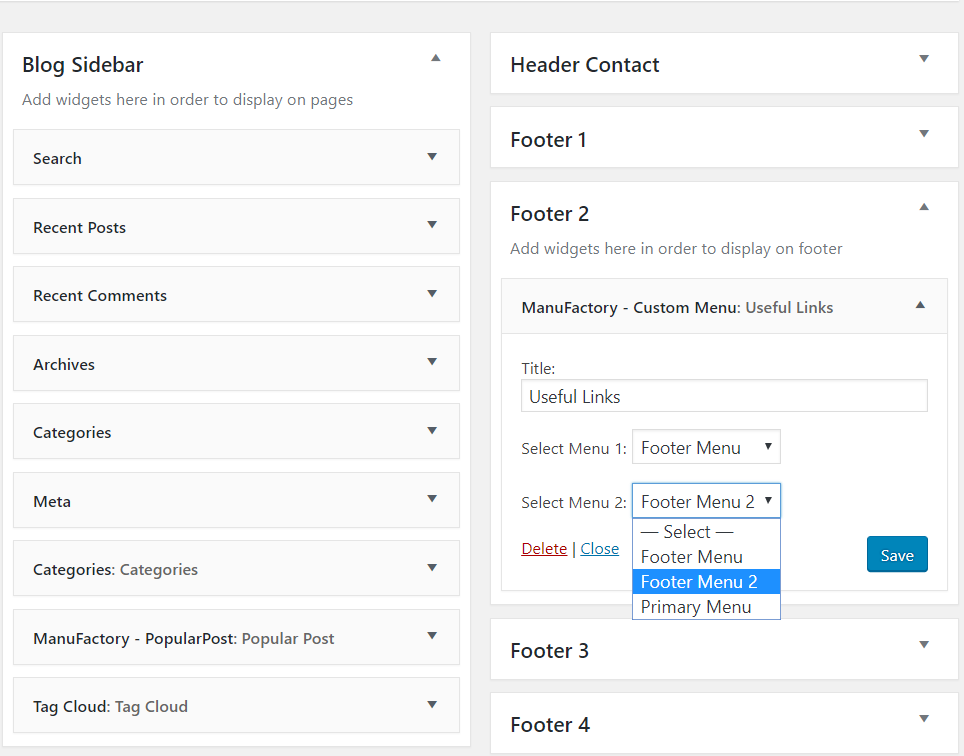
- Go to Appearance > Widgets.
- Go to Footer 2 > select Custom Menu is Footer Menu for Menu 1 and Footer Menu 2 for Menu 2.
- Click Save.
Step 7 - Setup Widget
Although the theme is working now and it shows menu, but because we haven't created a menu for primary location, the theme will display all pages by default.
When you import the demo data, WordPress automatically create menus for you. These menus are the same as our demo.
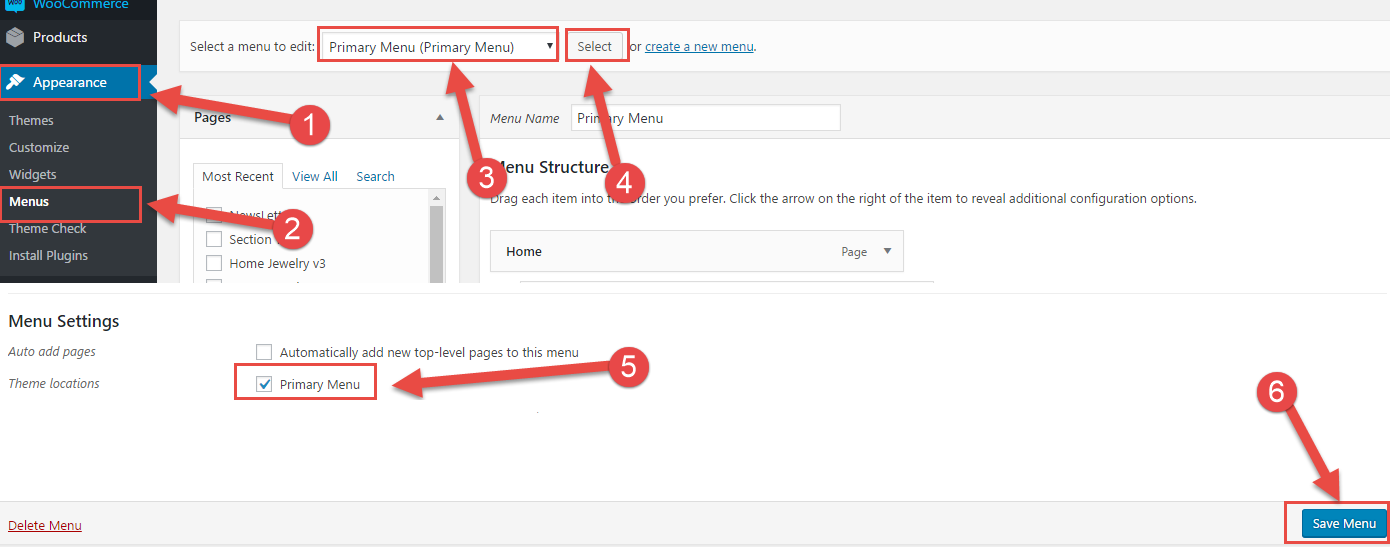
**Primary Menu**
- Go to `Appearance > Menus`
- Select **Primary Menu** and click **Select** button to edit it.
- Scroll to bottom of page and check **Primary Menu** for **_Theme location_**
- Click **Save Menu**
Step 8 - The final step
There are some things you need to change. To do them, please see the steps below.
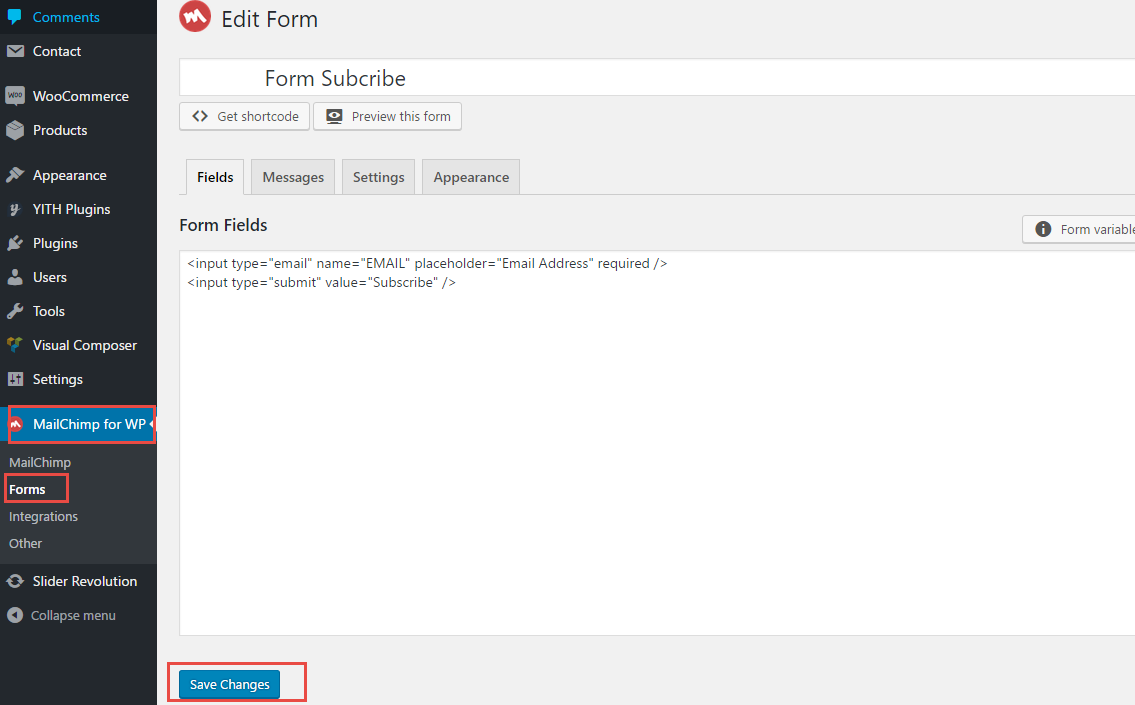
**MailChimp Form**
- Go to `MailChimp for WP`>`Forms`:
- Click **Save Changes**
**Contact Form 7:**
- Go to `Contact`>`Contact forms`>`Edit Contact form`>`Mail`:
- Contact Form 7 : There are several things you need to change here such as the email addresses...(as red-made in the screenshot):

**Activate & Save Permalinks**
To prevent any 404 errors on custom post type pages, after installing and activating plugins for this theme, you need to activate & save permalinks.
- Go to **Settings> Permalink** settings
- Select the format you would like to use.
- Click the **save** button.

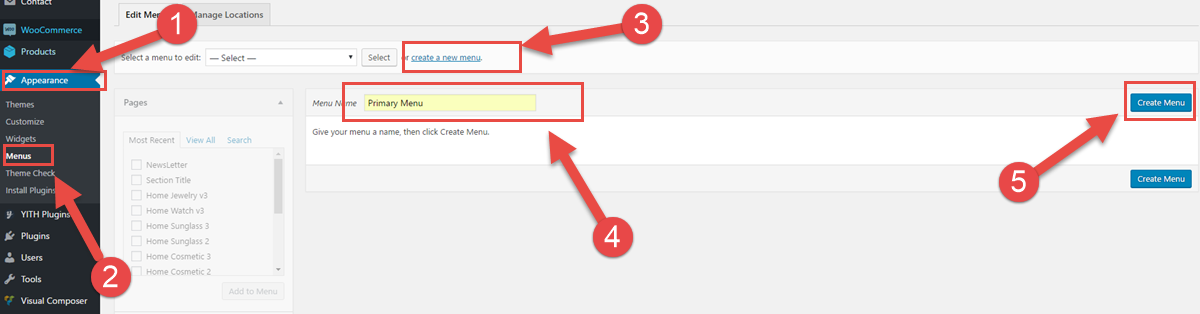
Create New Menu
===============
Following these steps to create a menu:
- Go to `Appearance > Menus`
- Click the **create a new menu** link to create new menu.
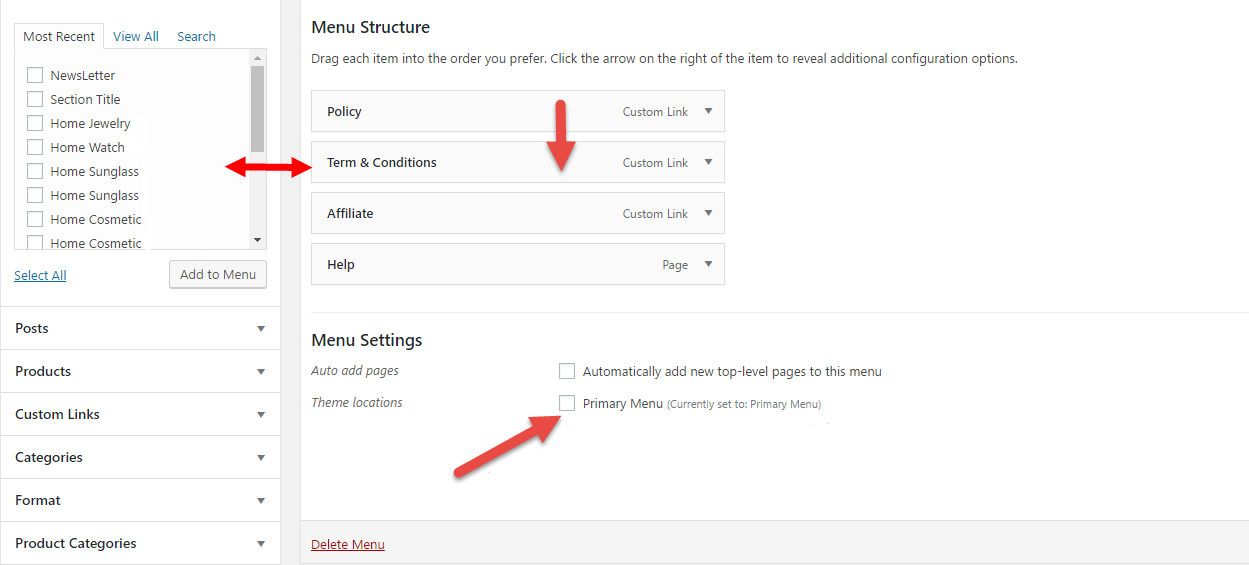
- Select items from the left meta boxes and click **Add to Menu**
- On the right, feel free to drag and drop menu items to organize them
- When you're done moving menu items, check **Primary Menu** for **Theme locations** at the bottom of the page
- Click **Save Menu**
Theme Options
=============
Induscity theme comes with unique, creative and easy-to-use Customize page. You can change all theme options in Appearance->Customize with live-previewing those changes before saving them.
All options have full description so you can know what you are doing. Just click and save!
General Settings
-------------------
**1. Custom Site Identity**
This option will help you edit your title and tagline, and set site icon (The Site Icon is used as a browser and app icon for your site).
Simply go to ‘Appearance->Customize->General->Site Identity’ and change your title, tagline and upload your site icon.

Styling
-------
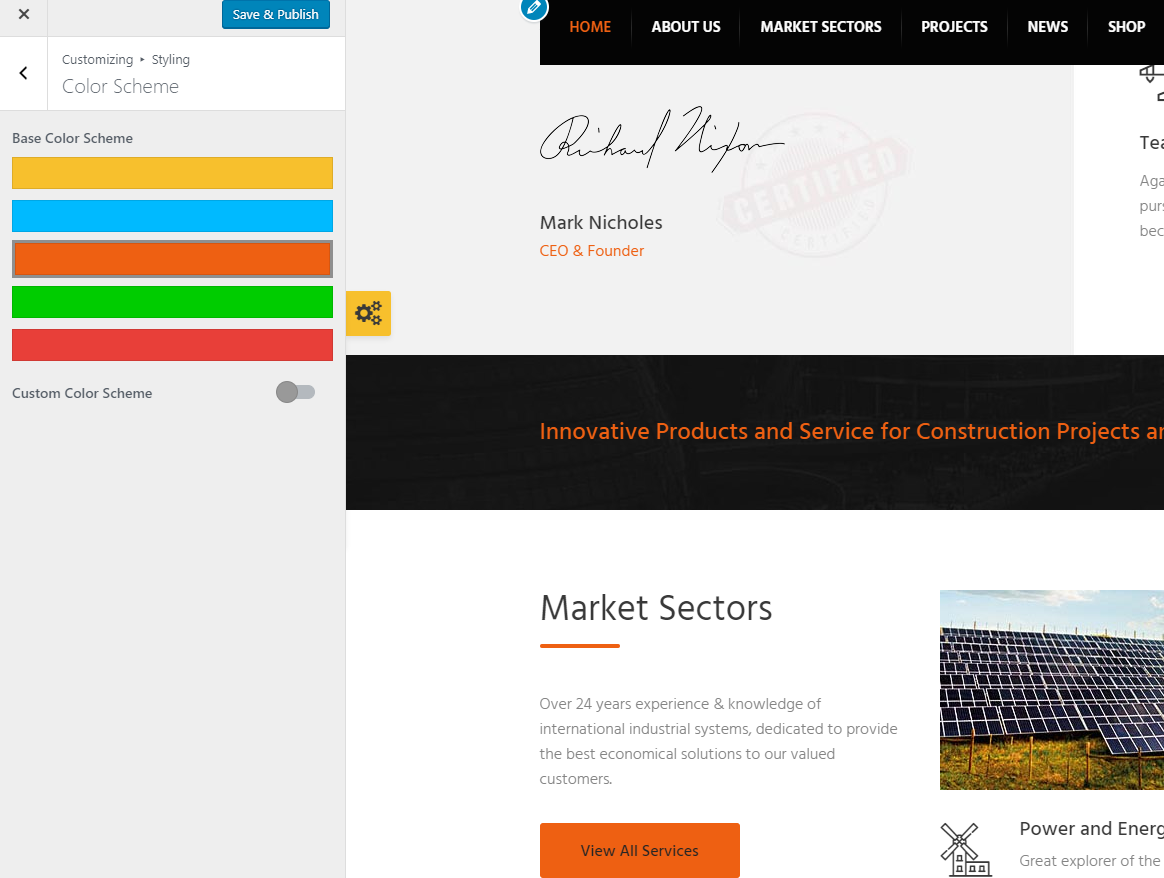
**1. How To Change Color Scheme?**
Simply go to Appearance > Customize > Styling > Color Scheme and select Base Color Scheme or custom your Color Scheme.
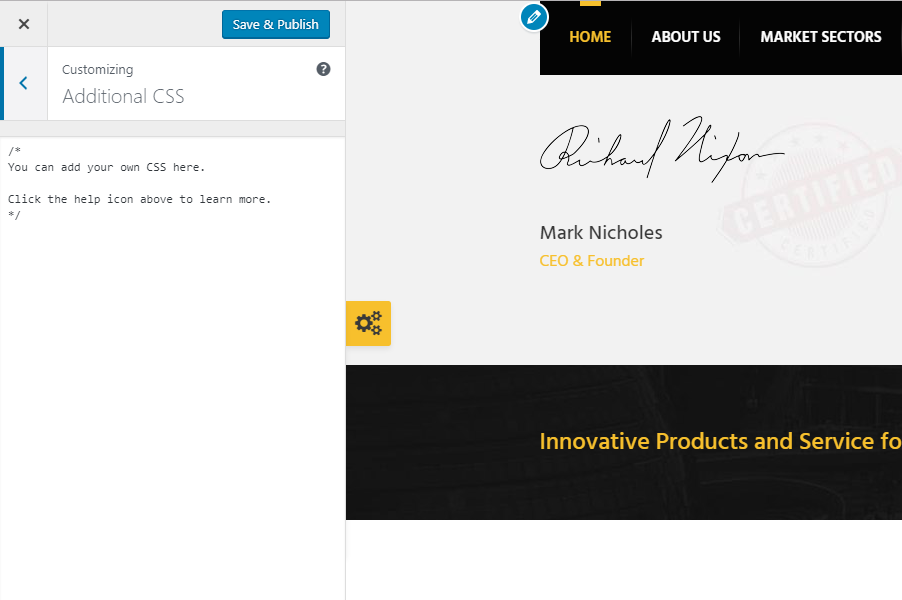
**2. How To Add Your Custom CSS?**
Simply go to Appearance > Customize > Additional CSS and paste your custom CSS.
Header
-------------
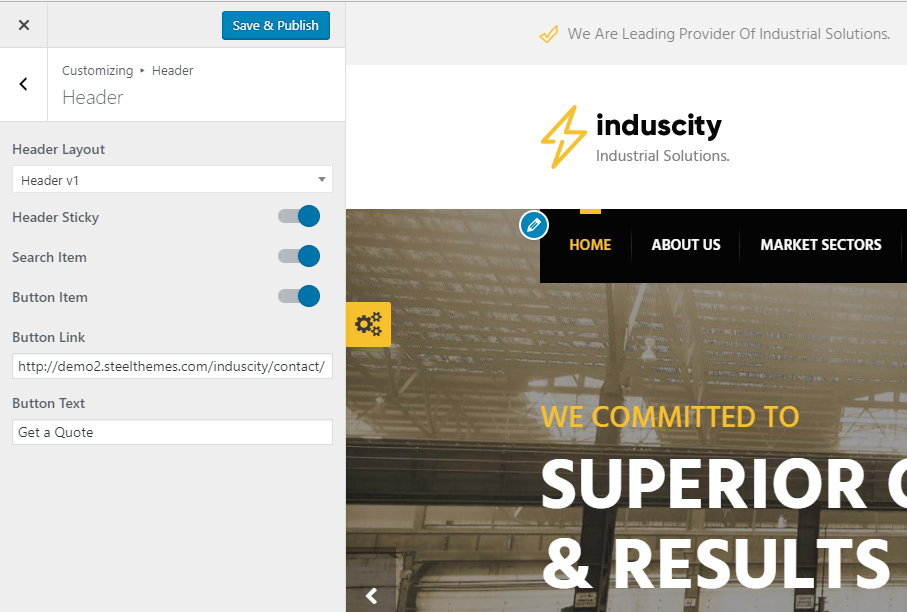
**1. Header Styles**
The theme includes 4 different Header styles and it easy to switch your header style.
Simply go to ‘Appearance -> Customize -> Header->Header Layout’ to select your header style.
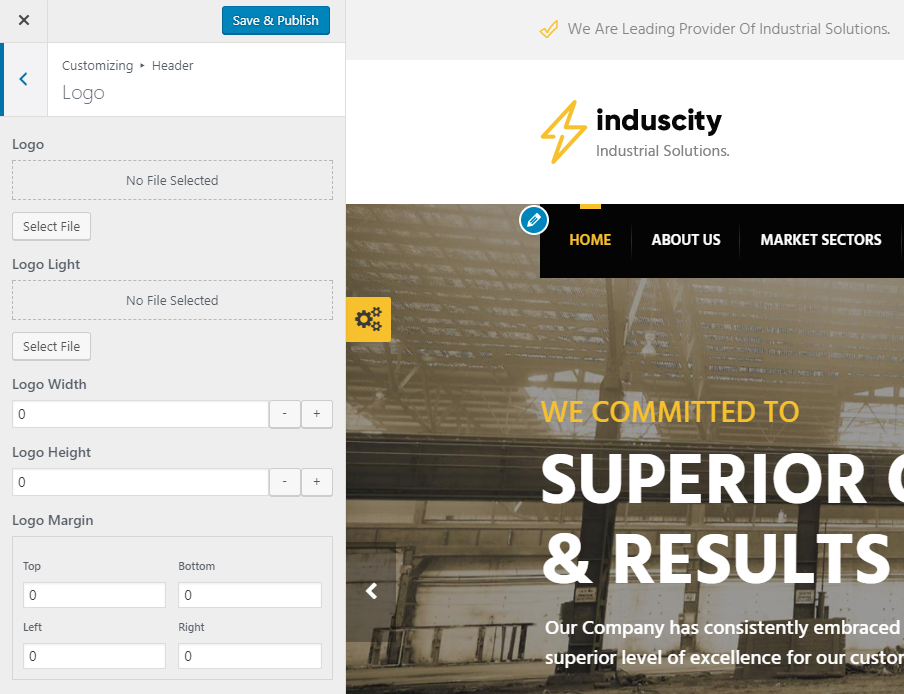
**2. How to Change Your Logo?**
The theme includes options to upload and custom your logo such as: logo width, logo height, logo margin. Simply go to ‘Appearance -> Customize -> Header->Logo’ to upload your logo.
Logo Transparent just is used for homepage that has header is transparent.
**3. Topbar**
The theme includes option to custom topbar such as: Show Topbar, Hide topbar on mobile device.
Simply go to ‘Appearance -> Customize -> Header->Topbar to upload your logo.

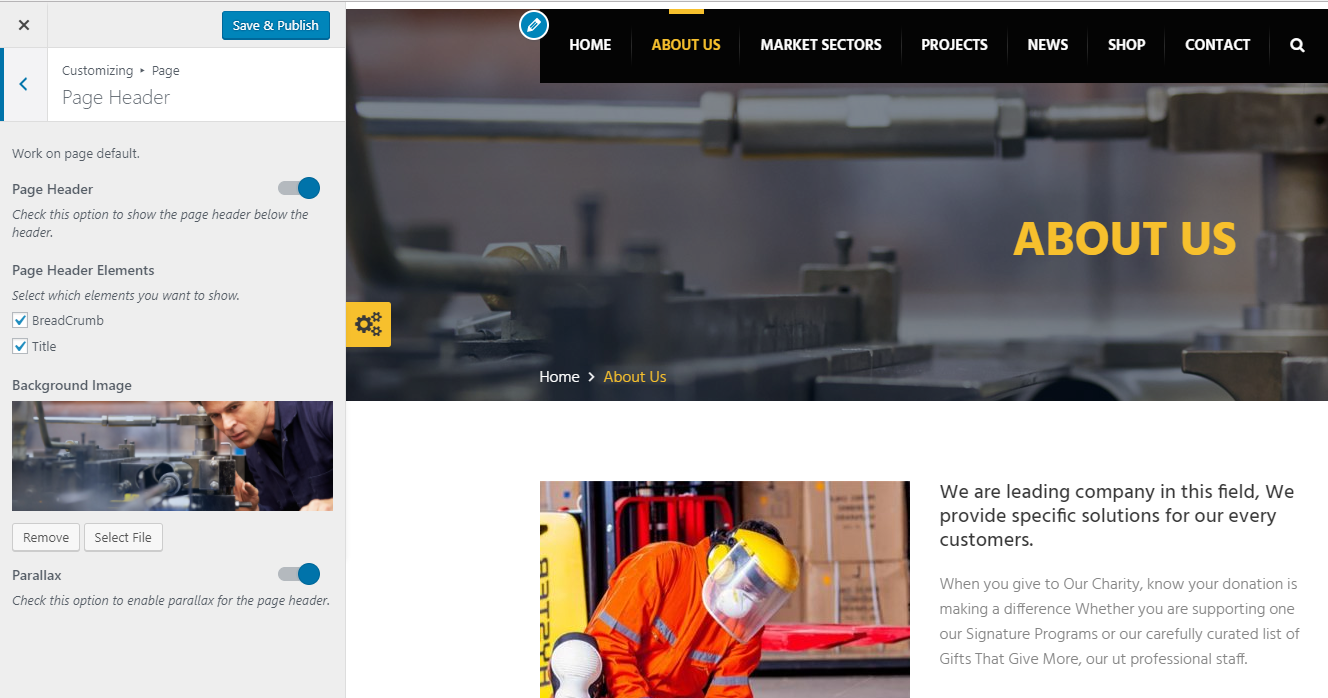
Page Header
-------------
The theme includes options to custom Page Header on Blog, Page, Shop, Services, Portfolio.
Simply go to ‘Appearance -> Customize -> Blog/Page/Shop/Services/Portfolio-> Page Header on...’ to select your settings.
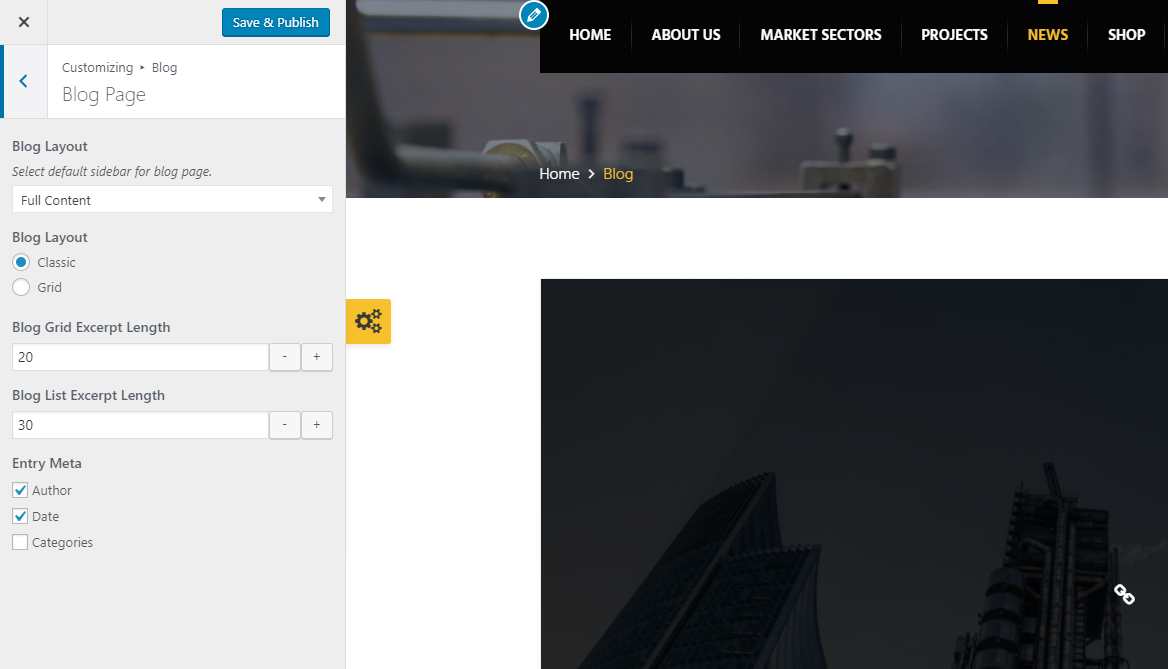
Blog
--------------
The theme includes 2 layout for blog page: Grid, Classic.
Simply go to ‘Appearance->Customize->Blog>Blog Page' and choose your settings.
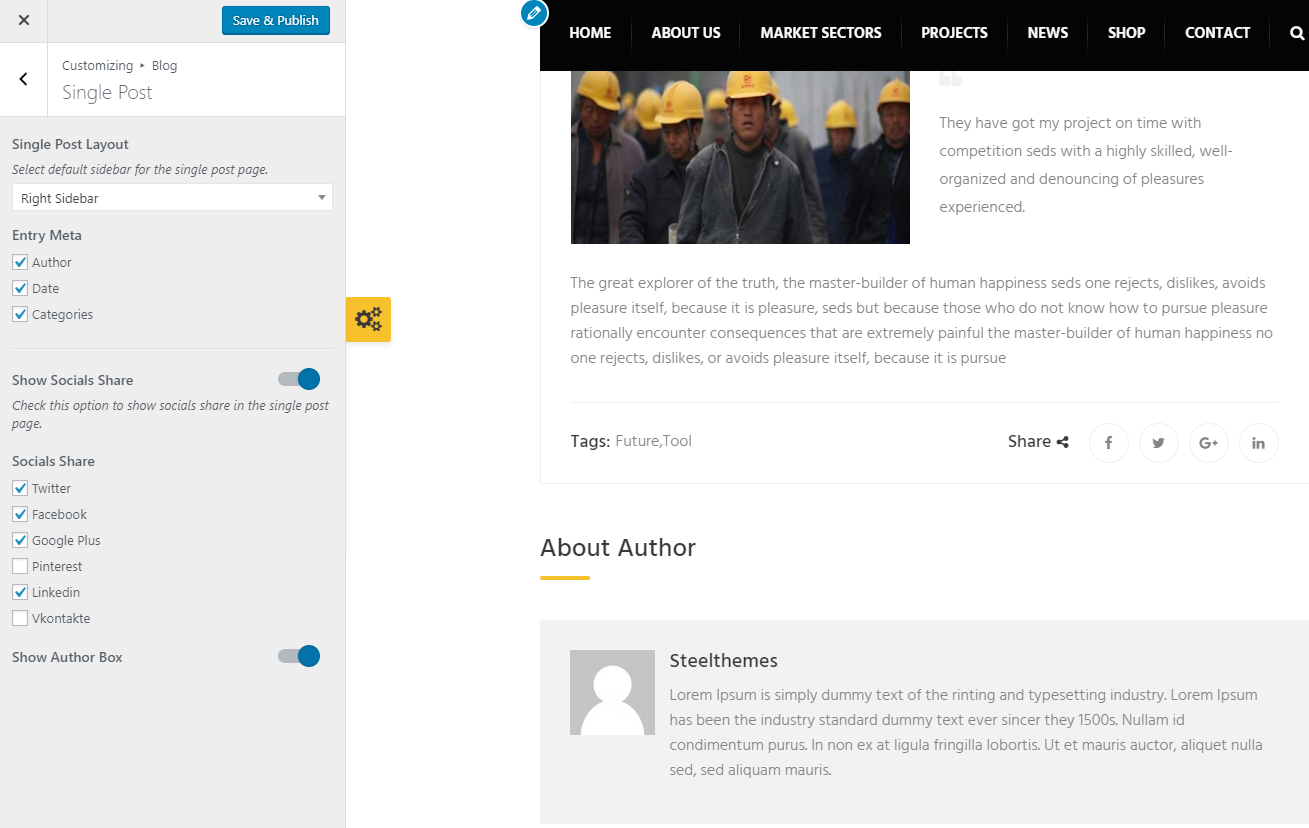
Single Post
--------------
The theme includes options to custom single post such as: Single Post Layout, Entry Meta. You can enable Socials Share for single post.
Simply go to ‘Appearance->Customize->Blog>Single Post' and choose your settings.
Woocommerce
--------------
**1. Video Tutotials**
- [01 – What is WooCommerce?](https://www.youtube.com/watch?v=MN38rw-y9pI&index=1&list=PLSXSDRo7EE-eQfsRcntKNxiwkgkotuJYq)
- [02 – How To Install WooCommerce WordPress Plugin?](https://www.youtube.com/watch?v=n4SiHzVpLXI&index=2&list=PLSXSDRo7EE-eQfsRcntKNxiwkgkotuJYq)
- [03 - How To Import WooCommerce Dummy Data?)](https://www.youtube.com/watch?v=n0Gitsijw5I&index=3&list=PLSXSDRo7EE-eQfsRcntKNxiwkgkotuJYq)
- [04 - How To Get Better Product URL With Custom Permalink?](https://www.youtube.com/watch?v=-YJ190Kne6A&index=4&list=PLSXSDRo7EE-eQfsRcntKNxiwkgkotuJYq)
- [05 - How To Use Shop Page For Homepage?](https://www.youtube.com/watch?v=Xpq2a8YS89w&list=PLSXSDRo7EE-eQfsRcntKNxiwkgkotuJYq&index=5)
- [06 - How To Display Product Categories On Shop Page?)](https://www.youtube.com/watch?v=Zba_BHxXys0&list=PLSXSDRo7EE-eQfsRcntKNxiwkgkotuJYq&index=6)
- [07 - How To Change Shop Currency?)](https://www.youtube.com/watch?v=hNFY-i5rccg&index=7&list=PLSXSDRo7EE-eQfsRcntKNxiwkgkotuJYq)
- [08 - How To Add A Simple Product?](https://www.youtube.com/watch?v=Ul4mYbyxDQo&index=8&list=PLSXSDRo7EE-eQfsRcntKNxiwkgkotuJYq)
- [09 - How To Sell A Service Product? ](https://www.youtube.com/watch?v=5KOyS20iLmg&index=9&list=PLSXSDRo7EE-eQfsRcntKNxiwkgkotuJYq)
- [10 - How To Sell A Digital Product?](https://www.youtube.com/watch?v=-bhKzPA5z1c&list=PLSXSDRo7EE-eQfsRcntKNxiwkgkotuJYq&index=10)
- [11 - How To Sell An Affiliate Product?](https://www.youtube.com/watch?v=7Z0nPQcSdmU&index=11&list=PLSXSDRo7EE-eQfsRcntKNxiwkgkotuJYq)
- [12 - How To Use Product Attributes?](https://www.youtube.com/watch?v=f2qYs7C4V5g&list=PLSXSDRo7EE-eQfsRcntKNxiwkgkotuJYq&index=12)
- [13 - How To Add A Variable Product With Variations?](https://www.youtube.com/watch?v=euos76MEa-o&index=13&list=PLSXSDRo7EE-eQfsRcntKNxiwkgkotuJYq)
- [14 - How To Change Product Images Size?](https://www.youtube.com/watch?v=YVLb3eG0JdI&index=14&list=PLSXSDRo7EE-eQfsRcntKNxiwkgkotuJYq)
- [15 - What Are Up Sells and Cross Sells?](https://www.youtube.com/watch?v=yJA_WNwThi4&index=15&list=PLSXSDRo7EE-eQfsRcntKNxiwkgkotuJYq)
- [16 - How To Create A Coupon Code?](https://www.youtube.com/watch?v=H2c7ajINGMU&list=PLSXSDRo7EE-eQfsRcntKNxiwkgkotuJYq&index=16)
- [17 - How To Add Terms & Conditions At Checkout Page? ](https://www.youtube.com/watch?v=8LD4saVKJGE&list=PLSXSDRo7EE-eQfsRcntKNxiwkgkotuJYq&index=17)
- [18 - How To Enable Registration On "My Account" Page? ](https://www.youtube.com/watch?v=9Y5J0opsuGw&list=PLSXSDRo7EE-eQfsRcntKNxiwkgkotuJYq&index=18)
- [19 - What is System Status page?](https://www.youtube.com/watch?v=m2WE28NcBk8&index=19&list=PLSXSDRo7EE-eQfsRcntKNxiwkgkotuJYq)
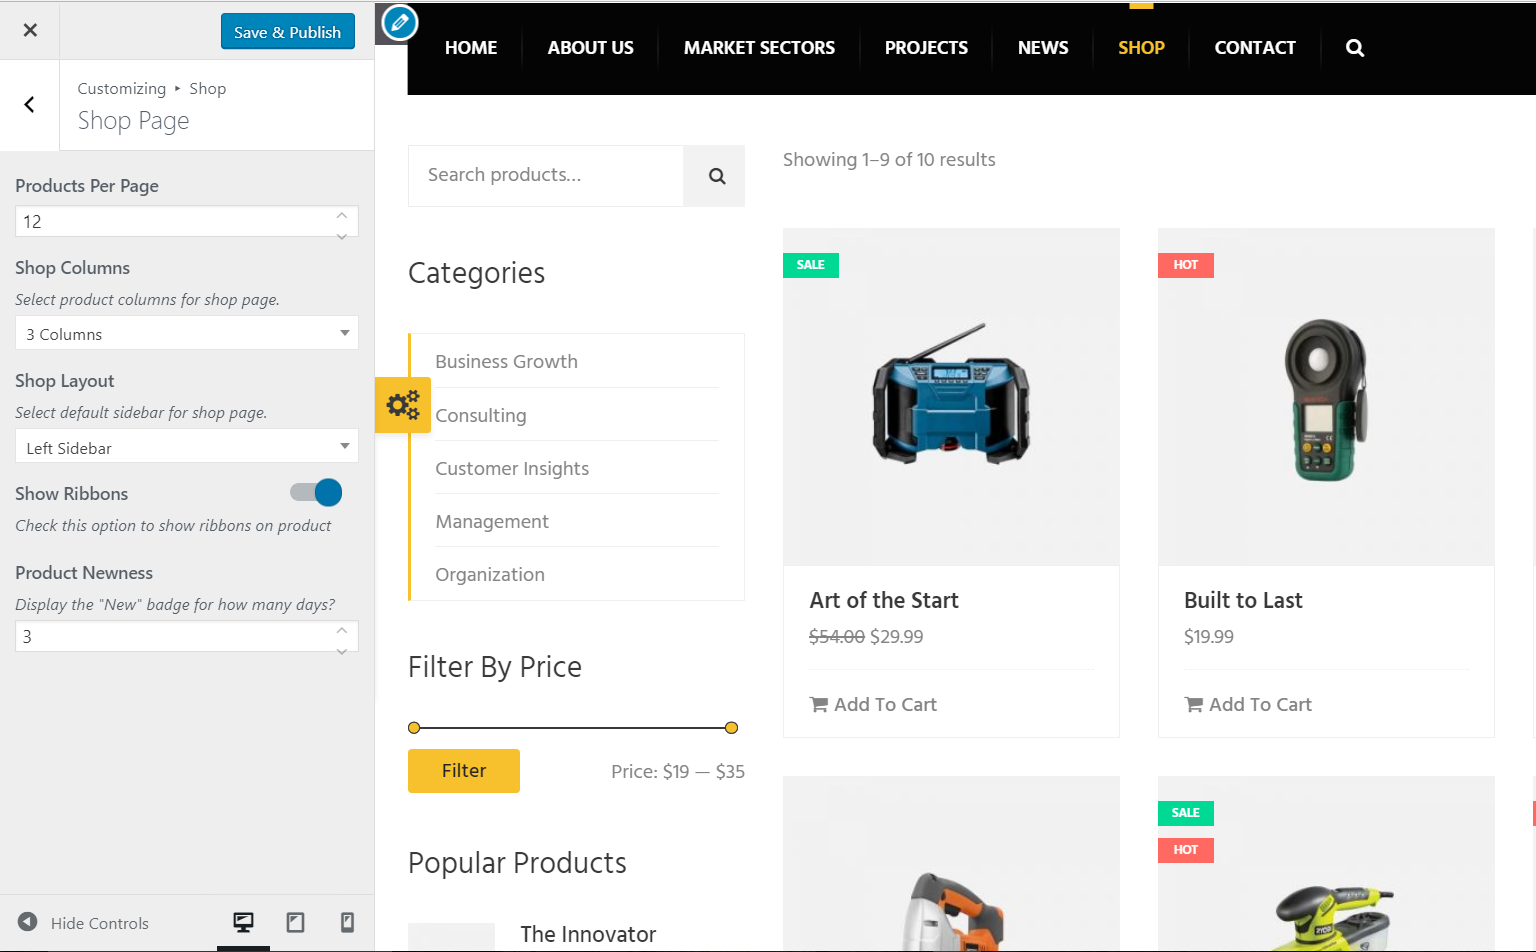
**2. Catalog**
This section includes options to setting your catalog such as: catalog layout, catalog view...
Simply go to ‘Appearance->Customize->Shop->Shop Page' and choose your settings.
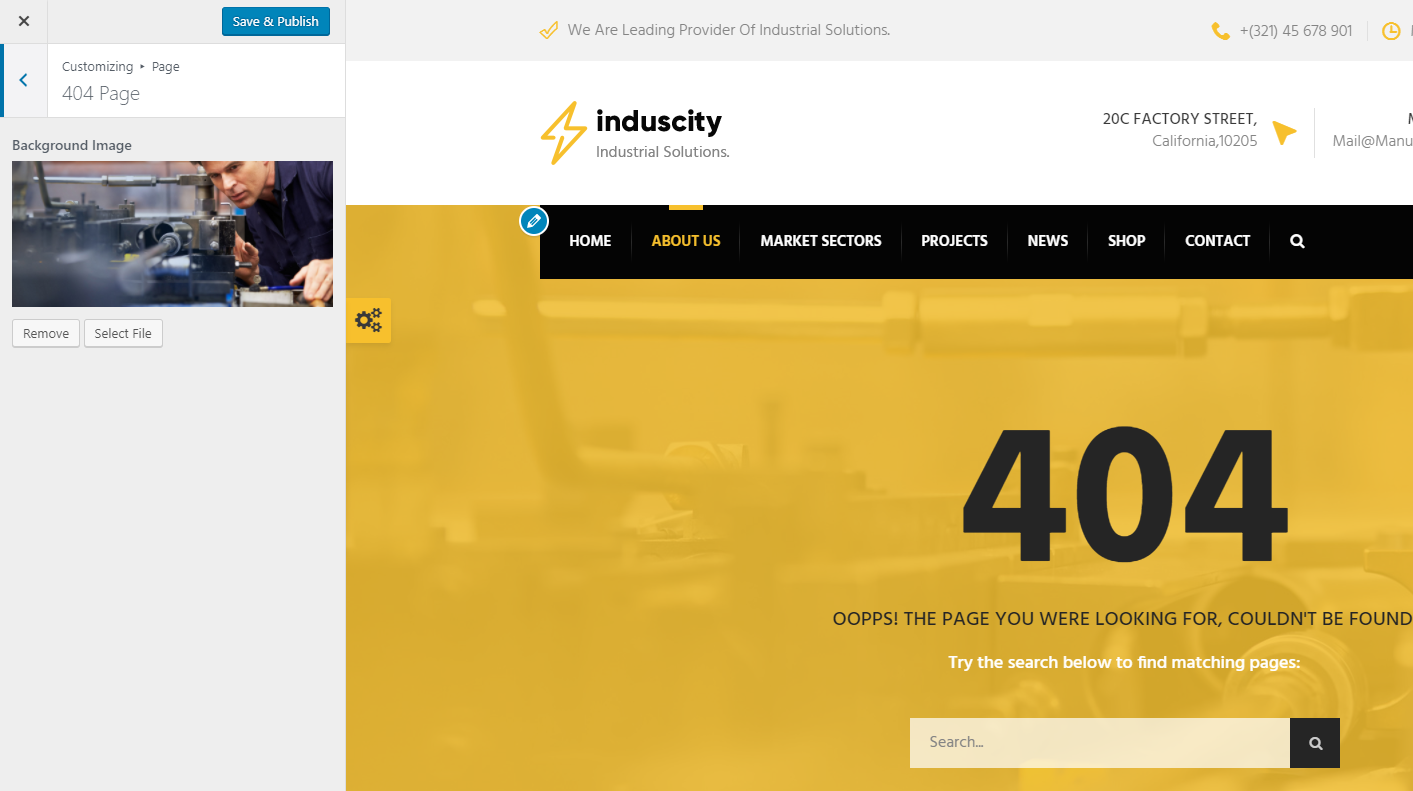
404 Page
--------------
So you need to go to ‘Appearance->Customize->Page>404 page' and change the background image.
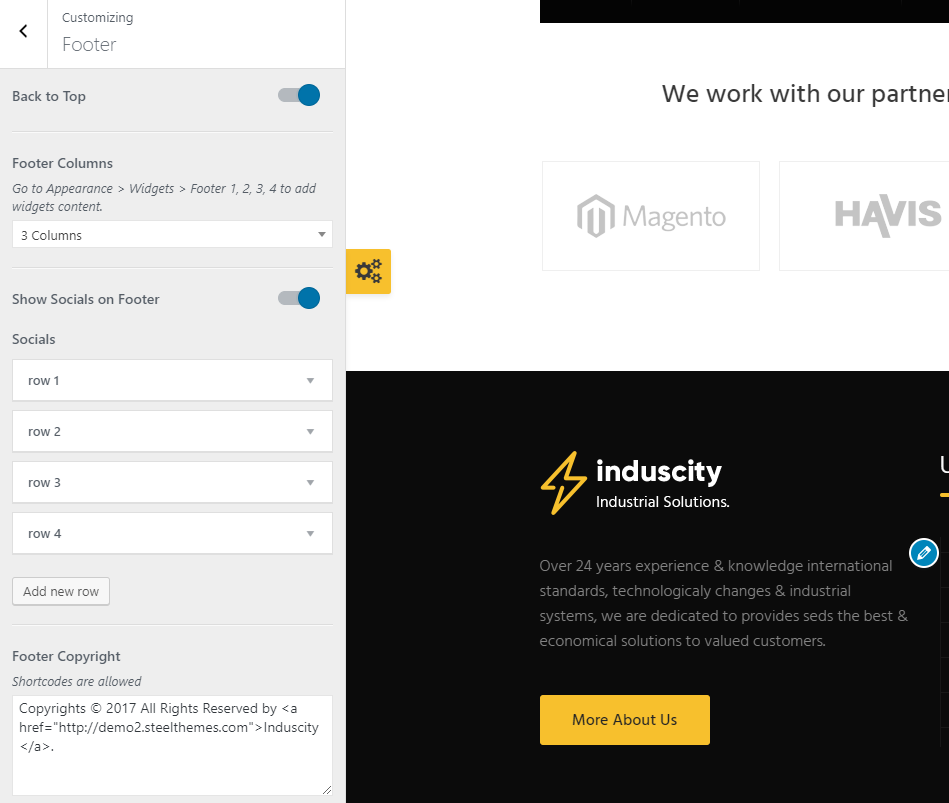
Footer
-------------
The theme includes 5 different Footer styles and it easy to switch your footer style. Simply go to ‘Appearance -> Customize -> Footer->Footer Layout’ to select your footer style.
Portfolio/Services
==============
Create Portfolio/Services Page
--------------
After you enable Portfolio support, you can view your portfolio in the link: http://your_domain/portfolio. But we recommend you to create a page for this to easier management in future. Please remember your portfolio URL will be that page's URL.
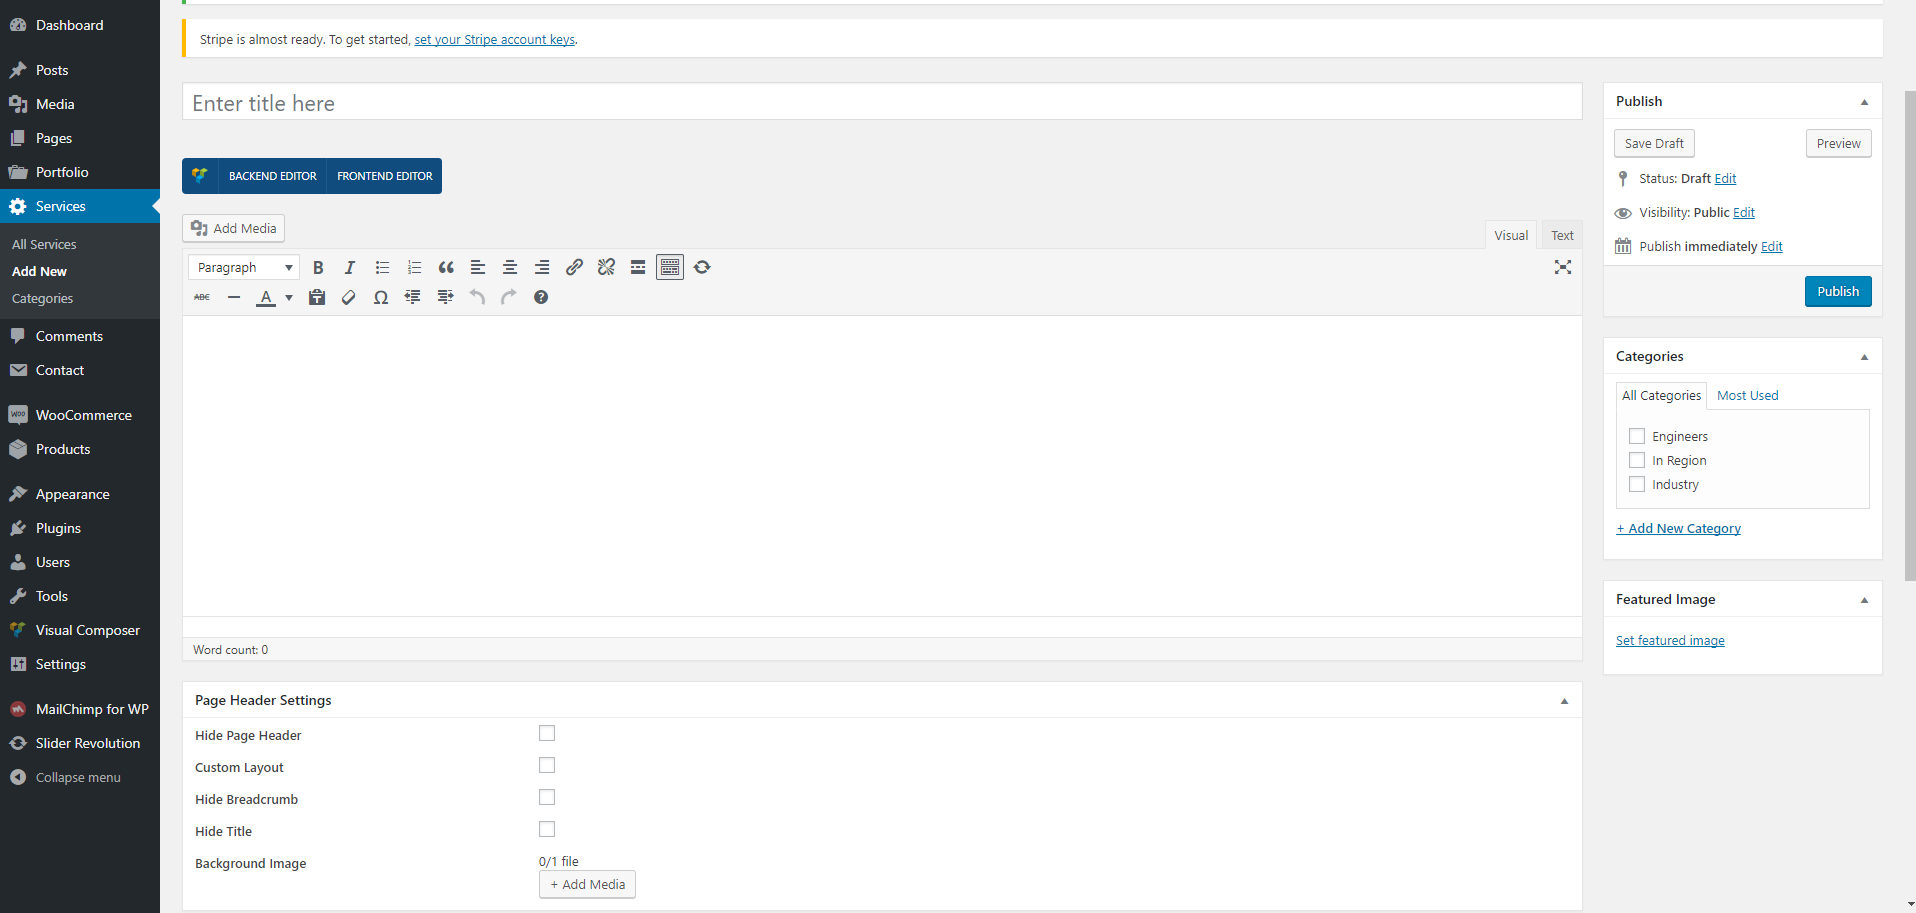
Go to Pages > Add New to create a new page for your portfolio. Name it as "Portfolio" or whatever you want.
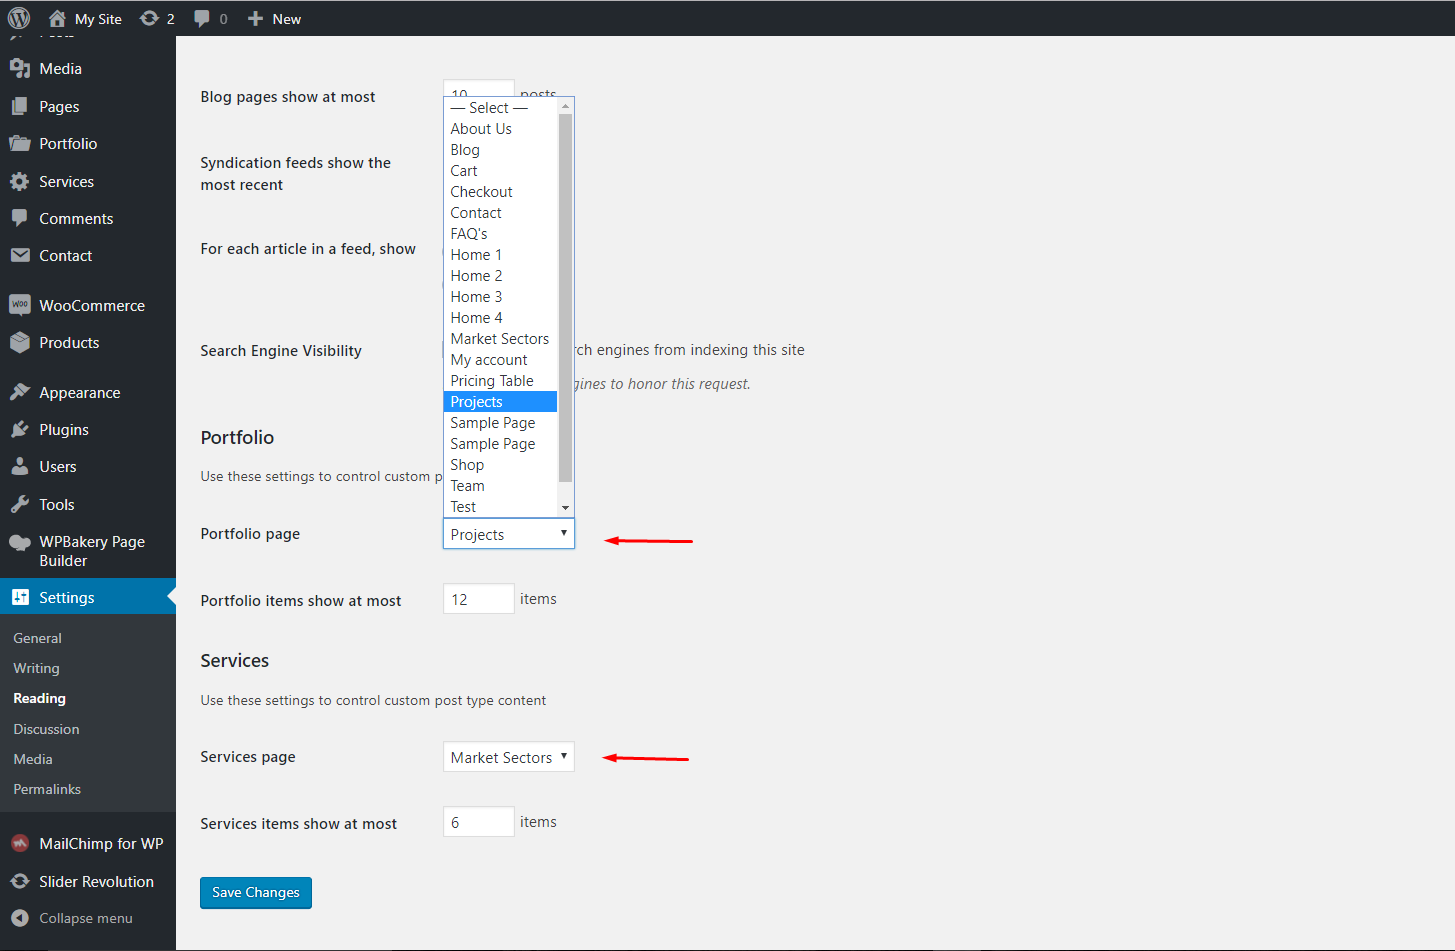
Go to Settings > Reading to select Portfolio page.
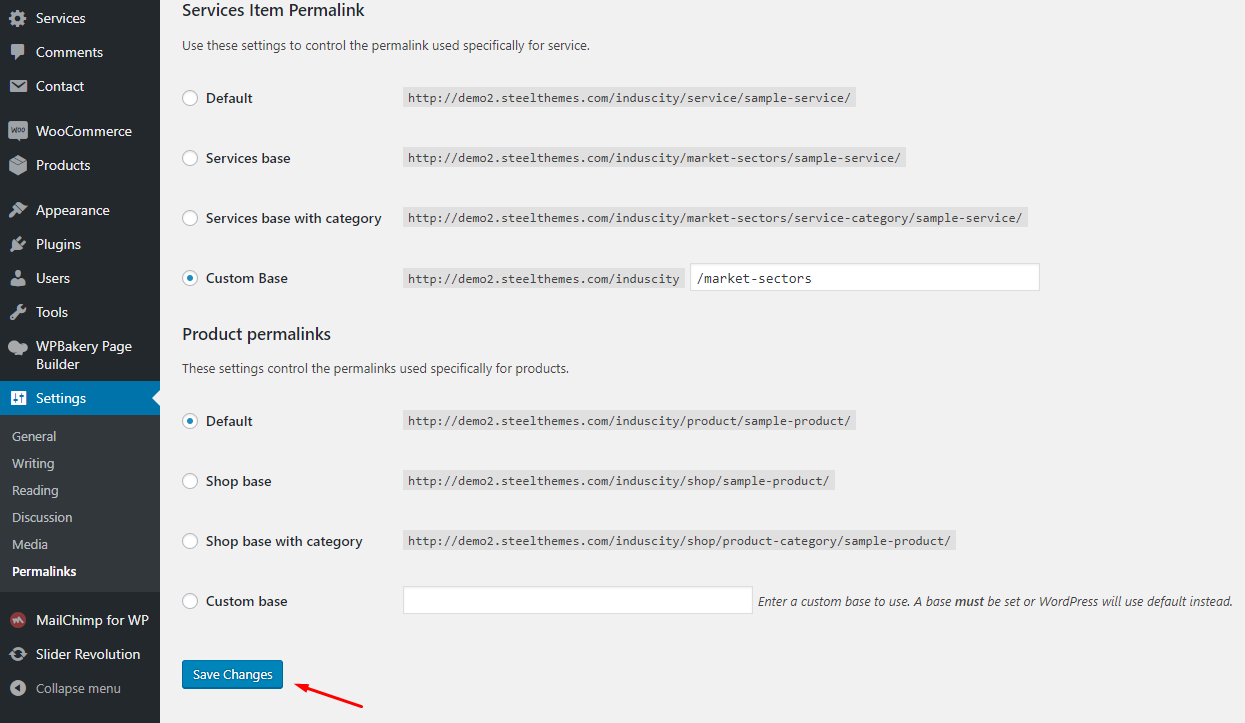
Change Permalink Structure
--------------
Go to Settings > Permalinks. Besides default settings of WordPress and WooCommerce, you will see new options for Portfolio/Services there. After change, scroll down and click **Save** button.
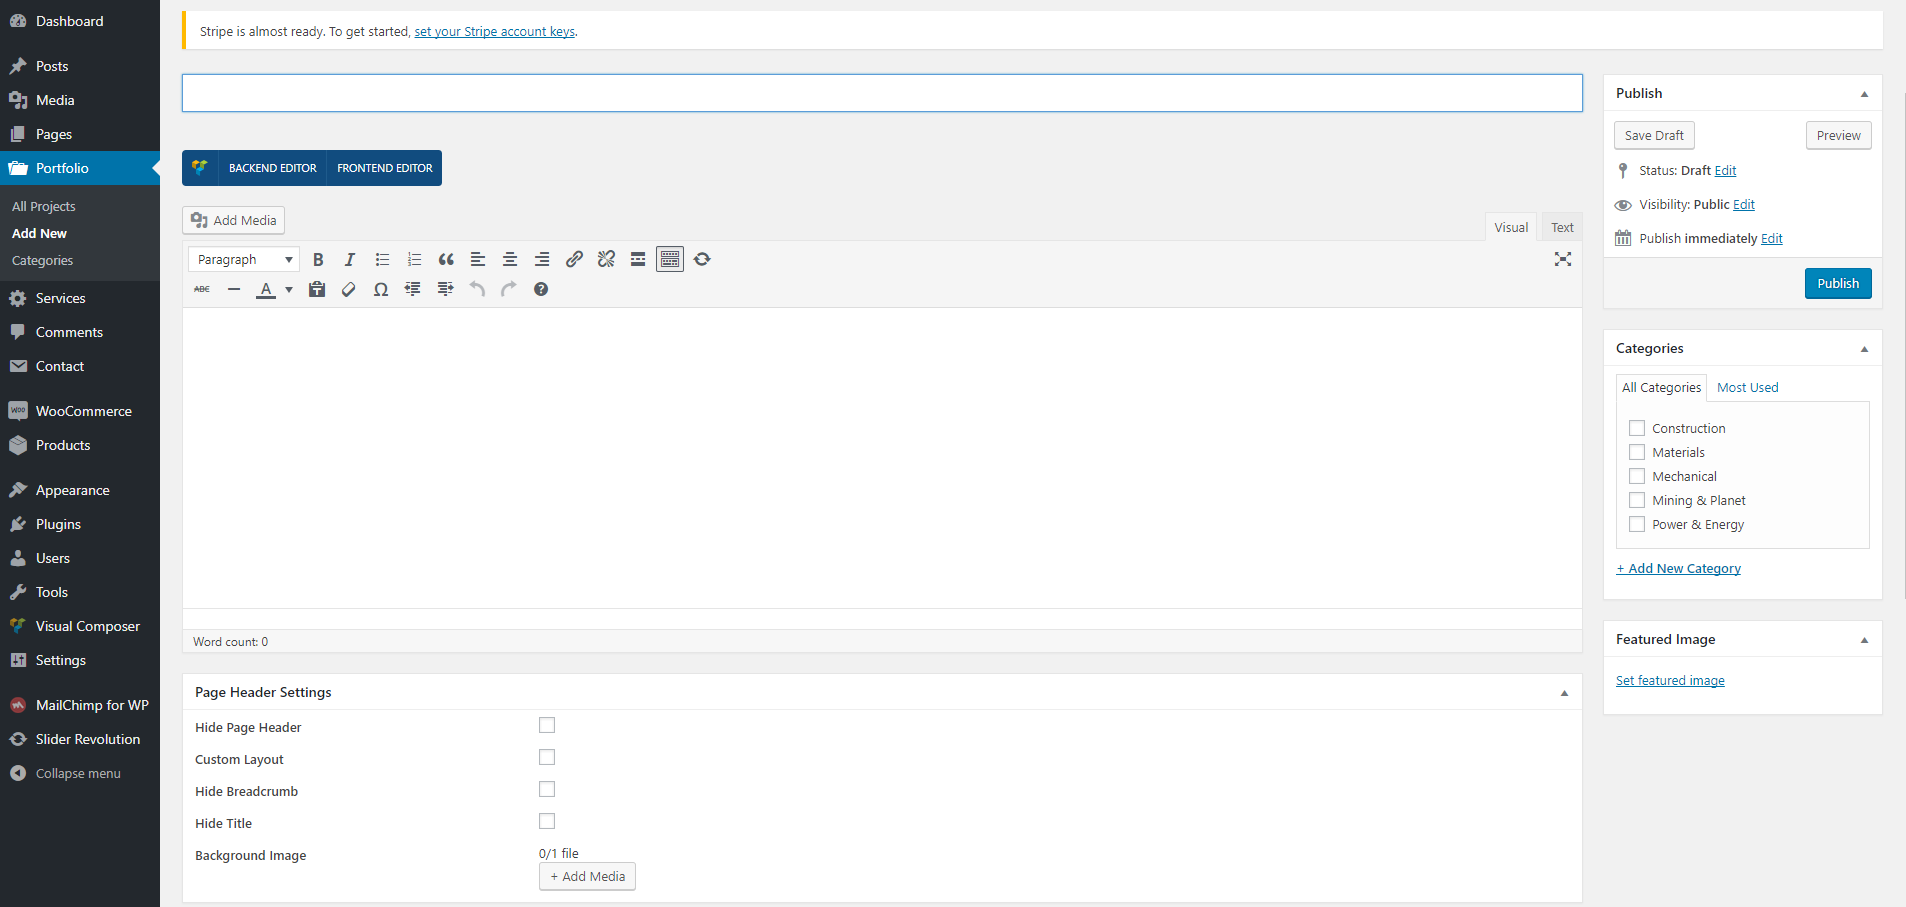
Manage Portfolio/Services
--------------
It's pretty simple to manage your projects. It's similar to manage posts. You can go to Portfolio > All Projects to manage your projects or go to Portfolio > Add New to add a new project.
- Portfolio
- Services
Portfolio Page Options
--------------
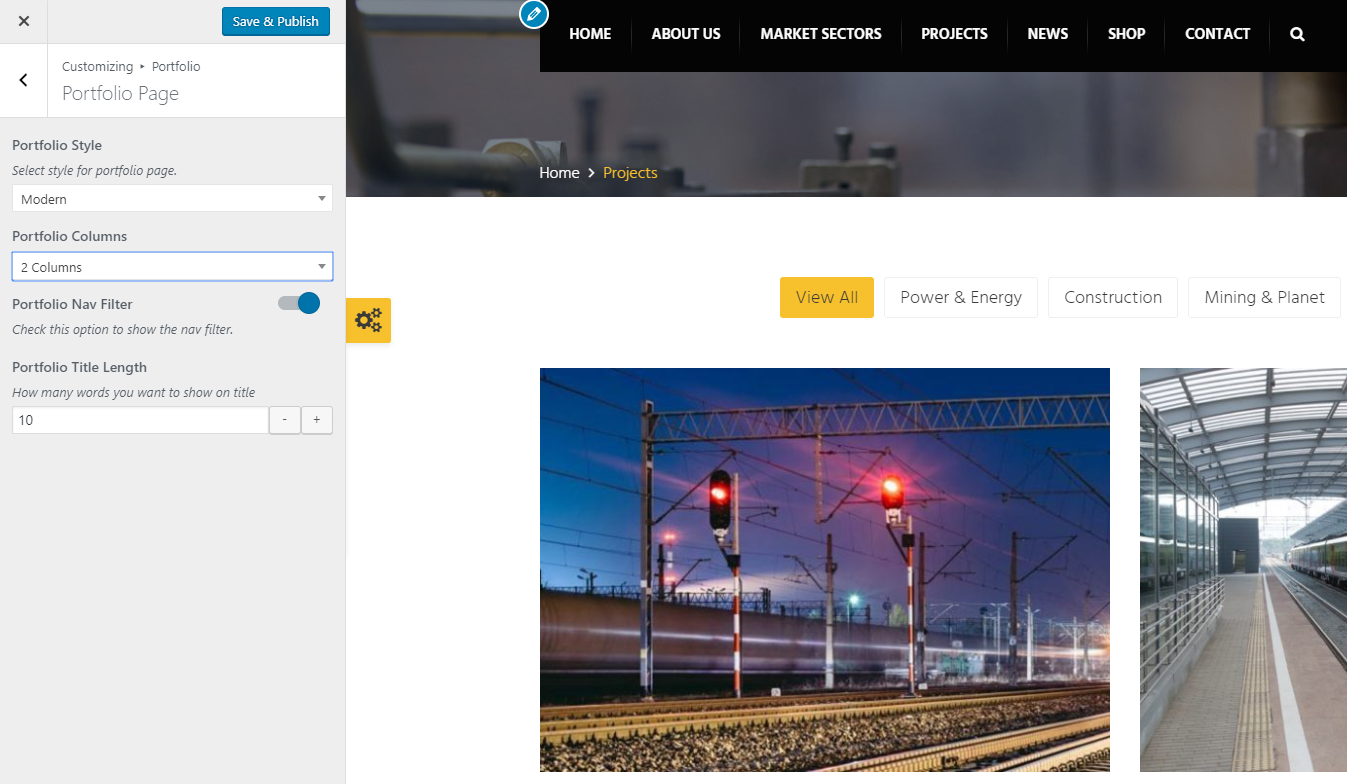
The theme includes options to setting your portfolio such as: Portfolio Style, Portfolio Columns...
Simply go to ‘Appearance->Customize->Portfolio->Portfolio Page' and choose your settings.
Service Page Options
--------------
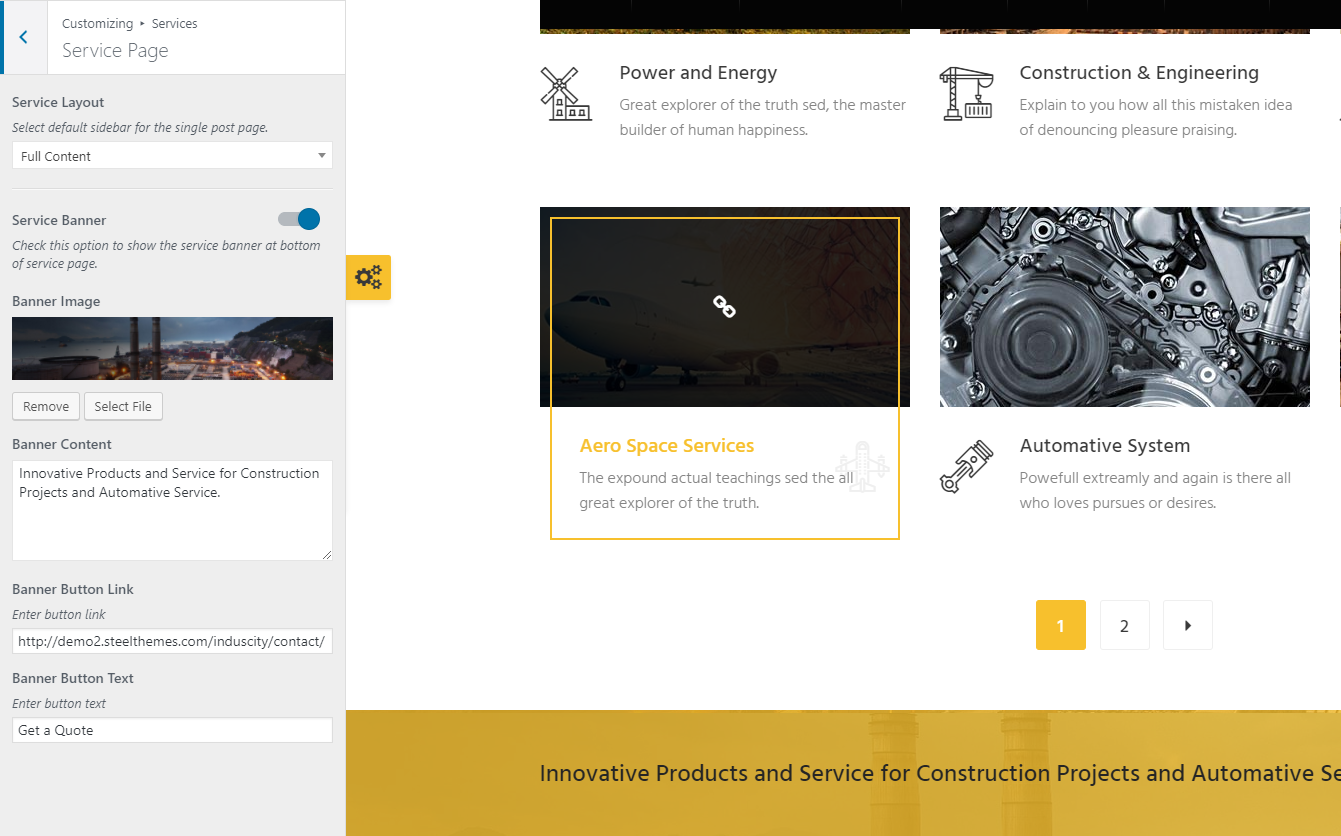
The theme includes options to setting your service such as: Service Layout, Service Banner...
Simply go to ‘Appearance->Customize->Service->Service Page' and choose your settings.
Visual Composer Basics
==============
It has very simple and intuitive interface, but before getting started, you may find it useful to get accustomed with its documentation:
- [Visual Composer Documentation](https://vc.wpbakery.com/video-tutorials/)
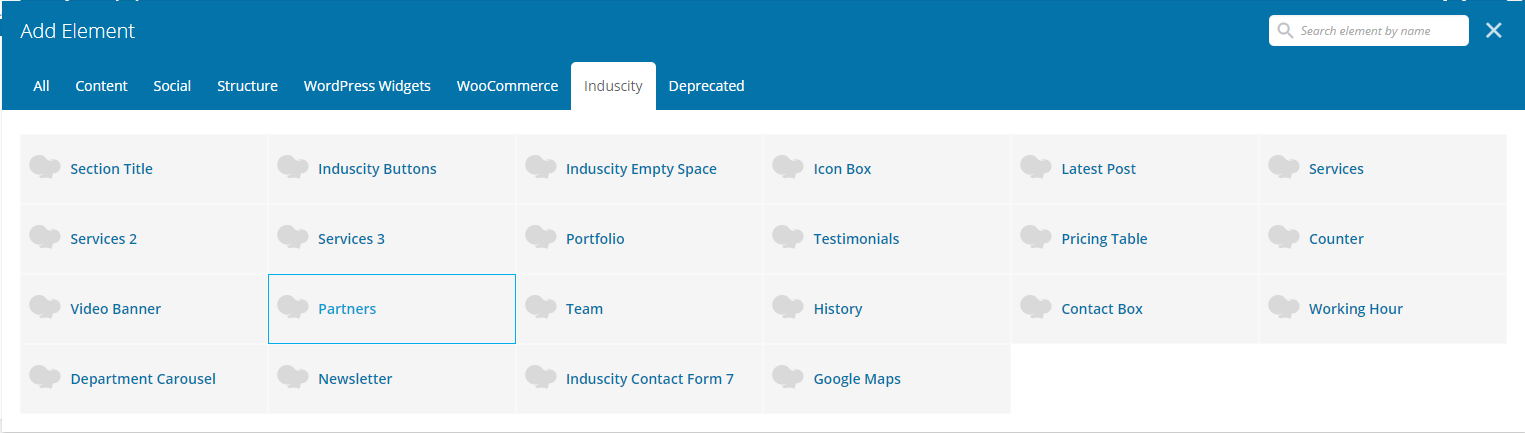
In Induscity theme, we also create some new elements and add some new parameters to exists elements of Visual Composer. It will help you a lot to build your HomePage easier.
Page Templates
==============
Induscity provided two page templates: HomePage, Full Width.
HomePage
--------
This template is used for pages as homepage. This template is full width and has no page header, no custom layout, no padding between the content and the header, the content and the footer.
Full Width
------------------
This template is full width and has no padding between the content and the header, the content and the footer.
Post Format
===========
[Post Formats](http://codex.wordpress.org/Post_Formats) is theme feature which is a piece of meta information that can be used by a theme to customize its presentation of a post.
In short, with a theme that supports Post Formats, a blogger can change how each post looks by choosing a Post Format from a radio-button list.
MrBara theme supports the following post formats:
- `gallery` - A gallery of images, which will be displayed in a responsive image slider, powered by Flexslider.
- `video` - A single video, which can be any video from Youtube, Video or other video websites. Support URL or embed code. The video will be displayed above post title.
Using post format in MrBara lets you differentiate post from each other and make the blog page / single page looks more beautiful.
When you edit a post, select a format you want to apply to that post on the **Format** meta box on the right:
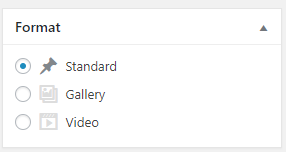
All you need to do is just enter **all** information in the fields in these meta boxes. This information will be used to decorate the post. For example: gallery post format will uses uploaded images to show a slider above post title, a video post will display a video player above post title, etc.
------------------------------
Translation
=========
The easiest way to translate your theme is by using the Loco Translate WordPress plugin. To use loco translate plugin, please see the steps below.
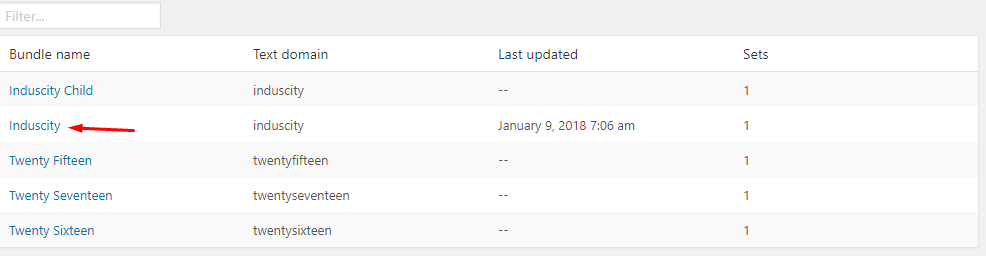
Step 1 – Install [Loco Translate WordPress](https://wordpress.org/plugins/loco-translate/) plugin.
Step 2 – Go to Loco Translate > Themes and click Induscity theme.
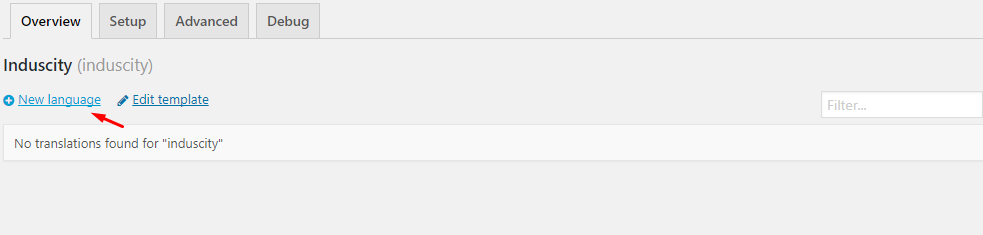
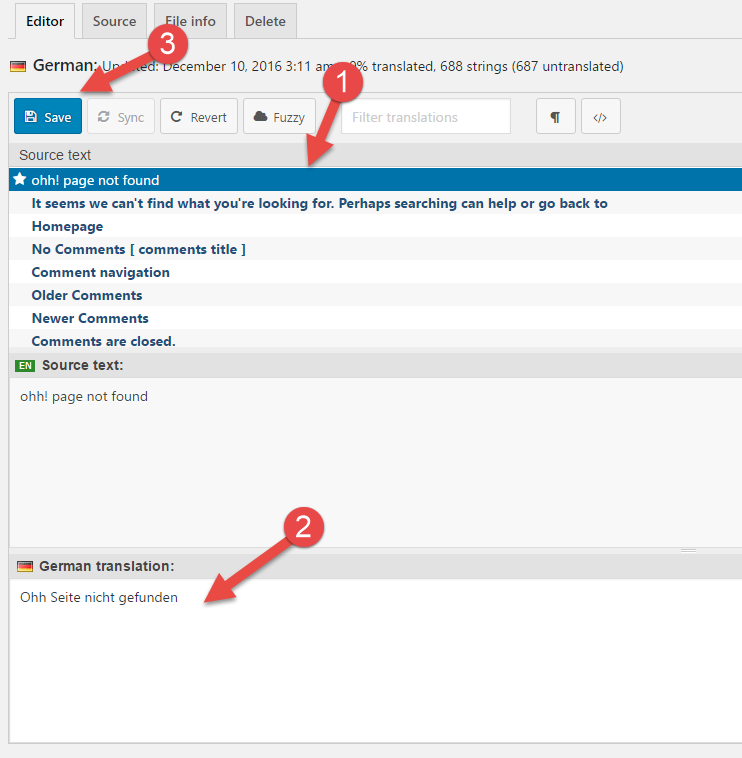
Step 3 – Click New Language link.
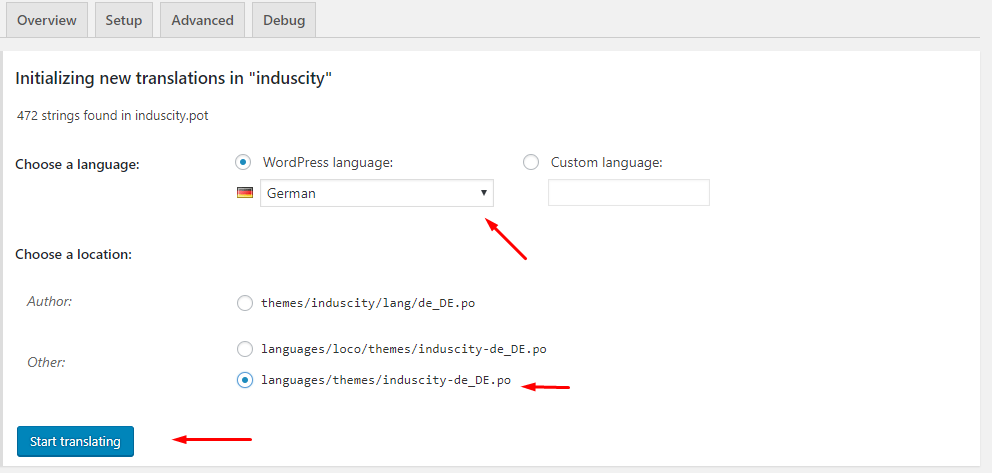
Step 4 – Choose your language and choose a location is in **languages/themes/**. We recommend you don’t choose a location is in **themes/induscity/lang/**, because after you update the theme all your custom files will be lost.
Step 5 – Click Start Translate button
Step 6 – Click Source Text and enter the text you want to translate in German translation.
Step 7 – Click Save button
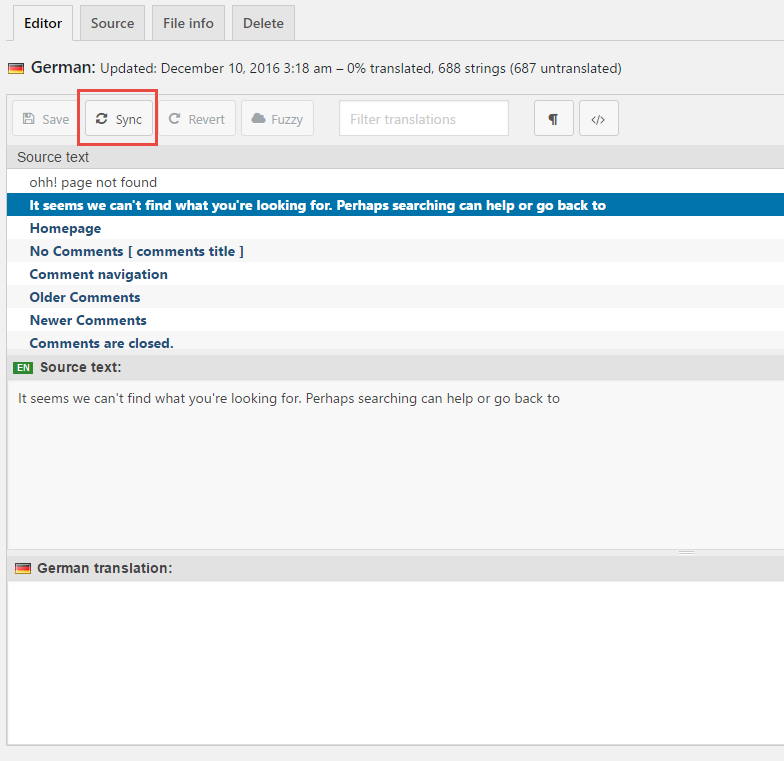
Note: To update your language file when you updated the theme, you only click Sync button.
------------------------------
Child Theme
===========
Induscity is fully child theme compatible. We have attached a basic child theme to the download package which contains the minimum of required files. If you are planing any code customizations we highly recommend to do this inside the child theme! Learn more about child themes [here](http://codex.wordpresss.org/Child_Themes)
------------------------------